Posted by Mandy on March 27th, 2012
I know I’ve mentioned my Mae Mae on this site many, many times and I believe I’ve even mentioned her famous soup before. My Paw Paw used to grow the best tomatoes. Matter of fact, I’d kill for one of them right about now. I have never in my life tasted one that tasted even close to his. He had acres and acres of tomatoes so there was always an overabundance of them at their house. Lucky was the day that Mae Mae made us her famous soup. I say famous because everyone in Canton has had Mae Mae’s soup at some point and everyone that’s ever had it is always begging for more. Please do me a favor and try it with crumbled cornbread in it…you won’t ever complain about vegetables again when they are this delicious!
P.S. This recipe isn’t so much of a “recipe” as it as a list of ingredients. I just dump things together and cook it all in one pot. Mae Mae never wrote down amounts of her ingredients so just add ingredients as you like.

Mae Mae’s Famous Vegetable Soup
stew meat
carrots, chopped
celery, chopped
1 teaspoon sugar
1 can creamed corn
butter, to taste (I usually only use a tablespoon or two)
onion, chopped
tomatoes, finely diced (I use canned and process in a food processor)
potatoes, peeled and cubed
1 can lima beans, drained
chicken broth
Boil stew meat until done. Allow to cool and then cut up in very small pieces. Take broth from stew meat and drain it into the soup pot. Put onions, carrots, lots of tomatoes, celery, potatoes, and sugar. Simmer for a while, until potatoes are almost tender. Add creamed corn and lima beans. Add butter and chicken broth until it’s to the consistency you like (like it thinner? Add more broth. Like it thicker? Add less broth.) Serve hot with homemade cornbread crumbled in it.
Filed under: Beef, Main Dishes, Soups & Stews, Uncategorized, Vegetables | No Comments »
Posted by Mandy on March 16th, 2012
I’m a sucker for a good chicken casserole. What better way to use up leftover chicken than to throw it in a big pan with lots of creamy goodness? And this chicken casserole is one of my favorites. My mother-in-law claims that she can’t cook as good as she used to, but every time she cooks something it tastes delicious to me. Thankfully, she was kind enough to share her delicious recipe with me so that I can share it with all of you! She makes this casserole for all of our holiday celebrations and I always eat way more than my fair share. I just can’t help it, it’s so good! I know all of my readers (hi y’all!) will love it just as much!
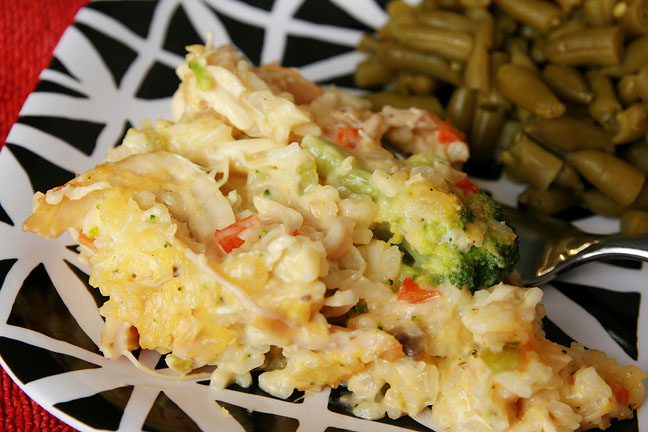
Look at all of those beautiful colors in one dish!
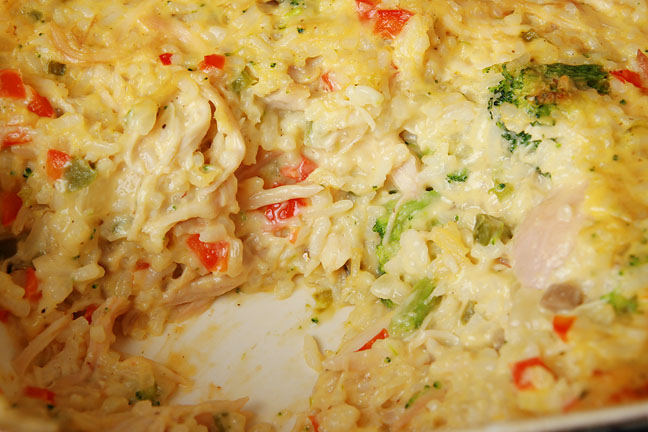
Carla’s Chicken Casserole
2 cups cooked rice
1 cup chopped onion
1/2 cup chopped red bell pepper
1/2 cup chopped green bell pepper
broccoli, cut into pieces (however much you prefer)
1 can cream of mushroom soup
1/2 cup milk
1 (8 oz) jalapeno cheese (or regular cheese, if you prefer)
chopped, cooked chicken (however much you prefer)
Preheat oven to 350 degrees F. Saute onions and peppers in two tablespoons butter. Mix all ingredients together and pour into a large casserole dish. Bake for 25-30 minutes or until hot and bubbly.
Filed under: Chicken, Holiday Favorites, Main Dishes, Rice, Thanksgiving, Vegetables | 8 Comments »
Posted by Mandy on March 14th, 2012
Chicken salad is one of those things that I could pretty much live off of if I had to. Then again, I’m a mayonnaise lover so it’s right up my alley. I love trying any new chicken salad recipes and this one has been a long time favorite of mine for about a year now. I almost feel guilty for not having shared this recipe with you all before. I’ve actually had this recipe photographed and everything just sitting in my folder of “Photos for Supermom”.
Speaking of this folder, have I ever told you about it? It’s got about 35 photos at any given time recipes that I have made and photographed and am just waiting for the perfect time to post. I hope that excites you all like it does me, so many delicious recipes to always share!
I faithfully keep all of the ingredients on hand to make this chicken salad whenever the craving hits. Once you’ve tasted it, I feel sure you’ll do the same.
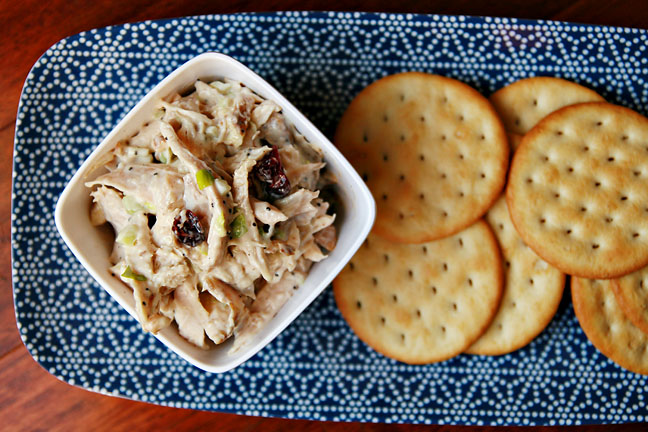
It’s every bit as delicious as it looks…
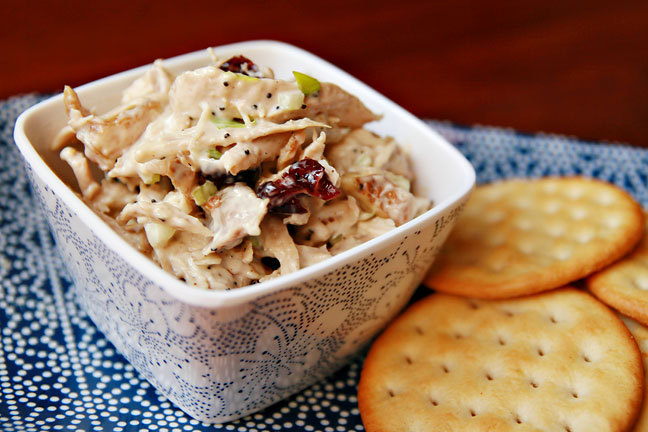
Fancy Schmancy Chicken Salad
For the dressing:
1 cup mayonnaise (I always use real mayonnaise for this recipe, not light)
4 teaspoons apple cider vinegar
6 teaspoons honey
1 teaspoon poppy seeds
salt & pepper, to taste
For the salad:
1 small rotisserie chicken, shredded into bite size pieces (about 4 cups)
2 ounces pecans, lightly toasted and chopped*
1 cup small red grapes (halved if large)
2 celery stalks (with leaves), chopped
Measure and mix dressing ingredients, taste and adjust seasoning if needed. Set aside. Combine salad ingredients, then pour the dressing over the top. Stir to combine. Toss and refrigerate for at least one hour before serving.
* To toast pecans, place in a dry pan over medium heat, stirring occasionally until fragrant.
Recipe from: http://www.simplyscratch.com/2010/02/yum-chicken-salad.html
Filed under: Appetizers, Birthday Party Ideas, Brunch, Chicken, Main Dishes, Quick & Easy Weeknight Meals, Salads, Sandwiches | 2 Comments »
Posted by Mandy on March 12th, 2012
It’s been quite a while since I’ve posted a recipe for a peanut butter/chocolate treat so it’s well overdue. I never tire of such delicious sweet treats in my house. If there’s peanut butter in it, I’m almost guaranteed to love it! These yummy brownies were no exception. I threw these together one afternoon on a whim and have made them quite a few times since. These are sure to please any chocolate lover in your life so make them soon!
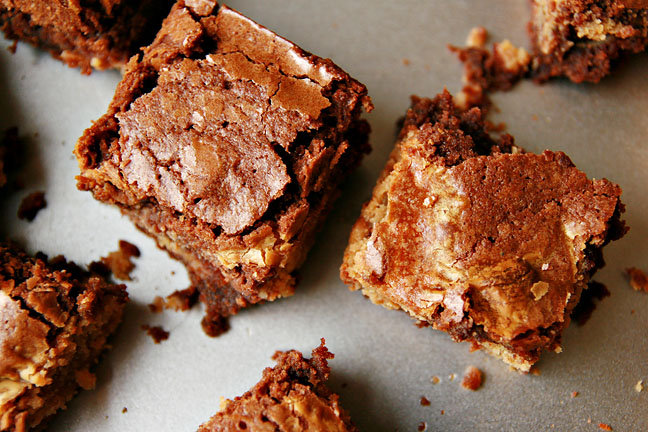
You know you want some!
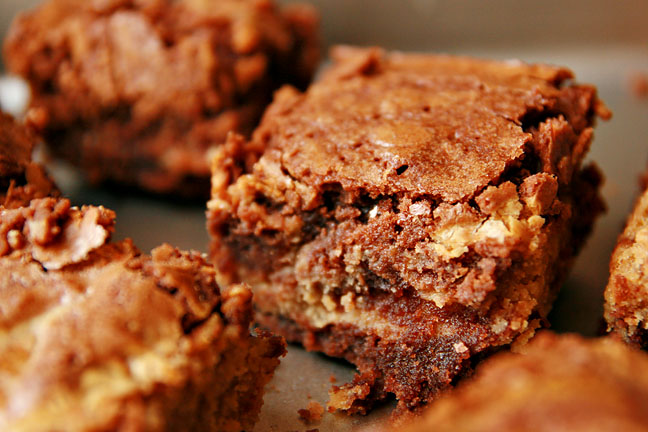
Peanut Butter Swirl Brownies
1 family size box brownie mix (and ingredients called for on the box)
1 can sweetened condensed milk
1/2 cup peanut butter
1 teaspoon vanilla
Preheat oven to 350 degrees F. Mix brownie mix according to package directions, pour into a 9×13″ dish for baking. In a small mixing bowl, mix together the condensed milk, vanilla, and peanut butter. Pour evenly over the brownie batter. Using a knife, swirl through peanut butter mixture and brownie batter. Bake according to package directions, adding a few minutes to the baking time to make up for the additional batter. Allow to cool before cutting into squares.
Filed under: Brownies, Chocolate, Cookies & Bars, Desserts, Kids Can Help | 1 Comment »
Posted by Mandy on March 7th, 2012
This recipe holds many memories for me, as it’s a recipe I remember my mom making all the time growing up. And usually my recipes bring back good memories, but this one, not so much. Why, you ask? Because kids are mean.
My mom was a wonderful mom, one of those moms that always made sure to pack a homemade lunch. And she really put the extra time in that moms should too. It was not uncommon for us to have a delicious, hot lunch in our thermos containers. This was one of those lunches. I guess this recipe makes so much that she always had leftovers for our lunch the next day because I remember taking it for lunch quite often. I loved the dish, but unfortunately the mean kids in school always made ugly comments about it. “That looks disgusting! You’re really gonna eat that?” Yeah, like I said, kids are mean. So eventually I got so sick of hearing it that I decided to stop eating my lunch on the days that she sent me red beans and rice. It was easier that way than being picked on. Then we went by my grandmother’s house for our daily afternoon visit, I’d go around the side of the house and dump out the thermos container so that my mom wouldn’t know I hadn’t eaten. It’s really sad looking back and thinking about it and I should have told my mom about it all, but I never was much of a tattle-tell so I just kept it all in.
So I said all of that to say, I’m now a proud red beans and rice eater. It’s not too bad for you, super cheap and easy to make, and absolutely delicious. Anytime my mom makes this dish now, I’m more than willing to eat it. She made it specially for me a couple weeks ago just so I could blog the recipe for all of you. See, just like I told you, she’s a wonderful mom. 

Red Beans & Rice
1 pound dry red beans
1 large hambone
1 large onion, chopped
1 clove garlic, minced
1/8 – 1 teaspoon ground red pepper (depending on how spicy you like your food)
2 teaspoons salt
1 pound smoked sausage, sliced at an angle into bite size pieces
1 whole bay leaf
Soak beans in water to cover overnight and drain. Put into a large Dutch oven or kettle and cover with water. Add all ingredients except sausage. Cook over medium heat until beans are tender; add sausage. Simmer until sauce gets soupy and thickens somewhat. Serve over hot white rice.
Filed under: Main Dishes, Pork, Rice, Soups & Stews, Southern Classics | No Comments »
Posted by Mandy on March 5th, 2012
Geez louise does life ever get so nuts when my hubby is away! He’s gone for 6 weeks at a time to his job in Alaska now and I’m here to tell ya…taking care of a house and three kids all by yourself is quite the job. I barely have time to do anything these days! I’m either cooking, cleaning, running errands, or taking care of kids. It never ends! So my list of “to try” recipes isn’t getting much knocked off of it these days, to say the least. I barely find time to cook what has to be cooked, much less something that I just want to try for fun.
Anyway, enough of that whining. I did find time to make something for you a couple weeks ago that I know you’ll love. This recipe came from my sweet friend in Boston, Lizz. My husband and I met Lizz and her hubby in the waiting room of Children’s Hospital Boston. Both of our kiddos were having surgery on the same day and since we were sitting closely, we naturally just began chatting away. We’ve been friends ever since that day almost 4 years ago! Lizz and her sweet, sweet boy “Baby Noah” as my 7-year old affectionately calls him, brought us these yummy cookies during one of our many trips to the hospital. Boy oh boy was I in heaven! Being stuck in the hospital for a month straight with a child that could not have anything by mouth (not even ice chips!) was really getting to me. I’d have to head downstairs to the cafeteria and scarf down my meals quickly then head back to the hospital room to care for him. I must say that these cookies made that dark time a little brighter and gave me something to look forward to with each trip to the cafeteria. It was like my kryptonite at the time! I’m thankful for having found a great friendship in Lizz and Bryan, and just as thankful for having this recipe that she shared with me. 
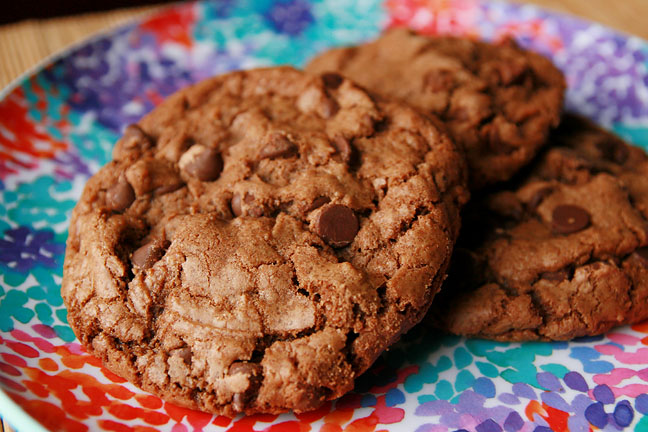
Lizz’s Double Chocolate Cookies
2 cups all-purpose flour
1/4 cup unsweetened cocoa
1/2 teaspoon baking soda
1/2 teaspoon salt
3/4 cup unsalted butter, melted
1 cup packed brown sugar
1/2 cup granulated sugar
1 tablespoon vanilla extract
1 egg
1 egg yolk
2 cups semi-sweet chocolate chips
Preheat oven to 325 degrees F. Grease cookie sheets or line with parchment paper. Sift together the flour, cocoa powder, baking soda, and salt; set aside. In a medium bowl, cream together the melted butter, brown sugar, and white sugar until well blended. Beat in the vanilla, egg, and egg yolk until light and creamy. Mix in the sifted ingredients until just blended. Stir in the chocolate chips by hand using a wooden spoon. Drop cookie dough 1/4 cup at a time onto the prepared cookie sheets, placing about 3″ apart. Bake for 15-17 minutes in the preheated oven, or until the edges are lightly toasted. Cool on baking sheets for a few minutes before transferring to wire racks to cool completely.
Filed under: Chocolate, Cookies & Bars, Desserts, Gifts from the Kitchen, Kids Can Help, Snacks | No Comments »
Posted by Mandy on February 28th, 2012
One day while over at Mimi’s (my mother-in-law’s) house she was making this yummy looking dinner. She said that it was a recipe that my sister-in-law Stacey had made for her a few days earlier and that it was so good that Papa (my father-in-law) had already requested it again. Even my three kids were standing by watching her cook it, all the while begging for pieces of sausage and “yummy sauce”. We even took some extra home with us so my middle daughter could eat another helping later that night. Within the next week, I had already made our family our own dish because it went over so well. Thank goodness Stacey was kind enough to share her recipe. This would make a delicious last minute throw-together meal on a weeknight. Turn on the rice maker while you make the sausage and peppers to serve over the rice and you’re set!

Stacey’s Quick Sausage & Pepper Dinner
2 packages smoked sausage, sliced
2 tablespoons canola or vegetable oil
1 large onion, chopped
2 bell peppers, chopped (any colors will work well)
1/2 cup water
1/4 cup apple jelly
2 tablespoons Worcestershire sauce
1 tablespoon soy sauce
dash of red pepper flakes
In a large skillet set over medium-high heat, brown the sausage in the oil. Add bell peppers and onion to skillet. In a large glass bowl, heat apple jelly, water, Worcestershire sauce, soy sauce, and red pepper in the microwave until the jelly is smooth. Stir until completely combined. Add sauce to the veggies and sausage. Heat, stirring occasionally, over medium heat until the sauce is thickened slightly. Serve over a bed of hot rice.
Filed under: Main Dishes, Pork, Quick & Easy Weeknight Meals, Rice, Sauce, Vegetables | 2 Comments »
Posted by Mandy on February 21st, 2012
I know, I know…y’all wanna drop-kick me to next week for going MIA on you, right? Well at least I have a good excuse. A short while ago (about 7 weeks to be exact) my hubby took a job working in Dead Horse, Alaska (Prudhoe Bay). Since he left, sickness has taken ahold in my house and has not let go. We started off those first weeks by making a trip to Boston for my son’s 20th surgery. Shortly after we got home, my middle daughter got sick, passed it to my 2-year old, who then passed it to me, and then it got passed back to the 2-year old again. We were well for approximately 2.4 days before it all started over again, except this time it was worse, much worse. My 6-year old daughter brought home yet another illness from school which she then passed to me, which then got passed to the 2-year old again. And while she was in the hospital for pneumonia my hubby’s flight home got messed up and he didn’t get to come home for his days off when he expected. Our first reunion happened bedside in room 474 of the local children’s hospital. As if that wasn’t enough, when my hubby did finally get home, he called to tell me that my 7-year old son was sick and he was taking him to the local children’s medical clinic. I had absolutely HAD it!
So fast forward to exactly one week later and guess what? We are all finally well *knocking on wood*. I should correct myself and say that we are all well for the most part. My 2-year old still has some junkiness in her lungs but they say that it could take quite a while for that to clean up. Lots of meds later she is finally feeling much better though, as are all of us, thank goodness.
What better way to return to blogging again than by posting a recipe for a delicious Broccoli Cheese Soup. None that I can think of. This delicious recipe is one I’ve been using for years. My Aunt Dee originally shared this recipe with me back years ago when I first was served this soup at their annual Christmas Eve gathering. I’ve been hooked ever since! So here ya go, long lost blog followers. I hope this persuades you to forgive me and coaxes you to come back soon for more recipes. I have missed y’all!

Broccoli Cheese Soup
1 small onion, chopped
5 chicken bullion cubes
5 cups water
2 cans cream of chicken soup
1 (1-lb.) box Velveeta cheese
1 box broccoli cuts or florets*
Place water, bullion cubes, and onion in a large saucepan and bring to a boil until the onions are tender. Add the cream of chicken soup. Cube the cheese and add it slowly. Lastly, add the broccoli and stir well. Heat over low heat to keep the cheese from sticking until ready to serve. You can also keep this in a slow cooker (on the “low” or “keep warm” setting) to keep it hot until ready to serve.
*Note: I used fresh broccoli florets that I blanched before adding to the soup.
Filed under: Appetizers, Holiday Favorites, Main Dishes, Quick & Easy Weeknight Meals, Soups & Stews, Vegetables | No Comments »
Posted by Mandy on February 7th, 2012
Let me just go ahead and get this out there – I’m a huge chess square fan. I’ve never met a dessert with the word “chess” in it that I don’t like. Chess is code word for “awesome stuff”, if you ask me. I have had this recipe idea in my head for a long time now. I have made different flavor chess squares in the past (tried my Chocolate Peanut Butter variation yet? http://www.thesupermomchef.com/?p=977). Well I figured you all could use a variation for make for your Valentine. And everyone knows that PINK is the color of Valentine’s (and red, but I wanted to make pink ones so just go with it, ok?)
I can’t even begin to tell you how delicious these are! Please don’t be snotty and say, “OMGAH! There is a boxed cake mix in there,” or “You cook with artificial flavoring?” I’m an easy kind of gal and if I can cook something this delicious by using those ingredients then dangit! I’m gonna do it! 

Strawberry Chess Squares
4 eggs
1 teaspoon vanilla extract
1 (8 oz) package cream cheese, softened
1 (16 oz) box powdered sugar
1 box strawberry cake mix
1 stick butter, softened
1 teaspoon strawberry extract
1/2 teaspoon red food coloring, optional
Preheat oven to 375 degrees. Mix together one egg, cake mix, and butter or margarine until crumbly. Spread onto a greased 9×13″ baking dish (glass, aluminum, whatever you have). Stir cream cheese until smooth (using a mixer works well). Add 3 eggs, food coloring (if using) and extracts; mix until fully incorporated. Slowly add powdered sugar; beat until well combined. Bake for 30-40 minutes or until set. Allow to cool before cutting into small squares.
Filed under: Cakes, Cookies & Bars, Desserts, Gifts from the Kitchen, Holiday Favorites, Snacks, Valentine's Recipes | 6 Comments »
Posted by Mandy on February 4th, 2012
I’ll be short with tonight’s post because it’s Friday night and I’m probably the only one east of the Mississippi that’s not got something exciting going on. *sigh* This is one of those recipes that, without a doubt, pleases everyone. I’ve never met a person that doesn’t enjoy a good bowl of Mexican cheese dip at their favorite local restaurant. In order to keep from going broke buying my kid’s their needed supply of this stuff, I needed to find a way to make it at home. This is our family’s favorite, but feel free to add/remove ingredients to your liking. Oh, and make this for your Super Bowl party on Sunday…you know it’s totally typical football food and positively needs to be on the table/buffet. Oh, and if you know what’s good for you, serve it right beside this (http://www.thesupermomchef.com/?p=555) homemade salsa. Dip in the cheese dip first, then salsa, then devour. All kinds of deliciousness, YUM!

Mexican White Cheese Dip (Queso)
1/2 pound white American cheese, cubed
1/2 – 1 cup milk
1 small onion, diced
1 jalapeno, diced (leave the ribs and seeds in for more heat)
1 red bell pepper, diced
1 garlic clove, minced or chopped
1 tablespoon oil
snipped fresh cilantro, for garnish
Place a medium size saucepan over medium-high heat; add oil. Add onions and peppers, and saute until the onions are translucent and peppers are softened. Add garlic and cook until fragrant. Add cubed cheese and milk (start with 1/2 cup and add additional milk to desired thin-ness), stirring often, until completely melted. Serve hot with freshly snipped cilantro for garnish, if desired.
Filed under: Appetizers, Dips, Mexican, Salsas, Snacks | 6 Comments »


