Beef Tips with Brown Gravy

Posted by Mandy on November 5th, 2010

If you wanna know one of the easiest things to make for dinner, this recipe is it. It’s perfect for a weekend when you’ll be home and want something yummy and comforting for dinner but don’t want to spend the entire afternoon in the kitchen. All you do for this meal is throw a few things in a pot, set the oven to 325 degrees, and pop it in on in for 3 hours. You don’t have to look at this recipe at all to check on it, I promise you…just pop it right in and walk away to spend the rest of the afternoon curled up in the bed watching movies with your children. My idea of the perfect afternoon!

You’ll only need a few things:

Sprinkle the beef with salt & pepper for flavor. Dump all of the ingredients together into the Dutch oven, mix and cook away, don’t peek! I had a recipe of the entire pot to show you, but for some reason I can’t get that photo to upload. So here’s the finished dish, ready to be eaten. Yummy!

Beef Tips with Brown Gravy

2 pounds beef stew meat

2 cans cream of mushroom soup

1 packet onion flavored soup and recipe mix

2 cups water*

2 bullion cubes*

Sprinkle salt and pepper on the beef to flavor it. Mix all ingredients together in a Dutch oven. Bake at 325 degrees for 3 hours. Don’t peek! Serve over hot rice.

*Note: You can substitute one can of beef broth for the water and bullion cubes, but I usually use the water and bullion to save money.

Sloppy Joes the Anderson way!

Posted by Mandy on November 2nd, 2010

You probably won’t ever find this recipe in any cookbook, at least not one that I didn’t write. This recipe goes back in my mom’s family for as long as I can remember. I remember having this as a child quite often. It’s easy, inexpensive, and couldn’t be anymore delicious. My grandmother made this dish on many occasions for her nursery children, and everyone always loved it. My kids call it “messy hamburgers” and devour it quickly every time I cook it so we have it quite often. The Worcestershire sauce wasn’t always something we added (at least I can’t remember ever adding it), but my husband suggested that it needed some “woo-woo juice”, as he calls it, to kick up the flavor some. We’ve been doing it that way in our house ever since. I’m also going to include our family’s recipe for what we lovingly refer to as “mixed up stuff”. Seriously, as long as I can remember we have called it that. It’s just ketchup, mayonnaise, and mustard mixed together but it’s soooooo good! The only problem I find when I make it is staying out of it until the sloppy joes/hamburgers are made to have enough to dress them up! I like to dip plain old sliced American cheese or Chee-tos in this sauce. So without making you wait anymore, here’s the recipe!

Start out by making the “mixed up stuff” using these ingredients (sorry about the crooked photo!):

Put about 1/4 cup mayonnaise into a small bowl. Add a small amount of mustard, to taste (I usually use a teaspoon or two). Sorry for the bad photo again here…dang blurry pic!

Mix these two up together really well before adding the ketchup or else you’ll end up with a lumpy sauce/spread. Add ketchup (here we usually do about 3 tablespoons)

Stir it all up

Set your sauce aside and start on the sloppy joes. You’ll need these items:

Start by browning your “hamburger meat” as we call it here in the South, but you may know it by the name of  ground beef. :) I like to use the lean beef because it’s so much healthier, but you feel free to use whatever you have on hand.

Once the beef is browned, drain off all the fat using a colander in the sink. Place the beef back in the same pan (why do more dishes?) and add your ketchup, seasoned salt, chicken gumbo (do not drain), and Worcestershire sauce.

Mix it all up together and keep warm until ready to serve

Grab your hamburger buns, and spread a generous amount of your “mixed up stuff” on each side, and spread the beef mixture in between the two buns.

Or you can serve it like I like mine, open faced and using a fork to cut and eat. Yummy!!!

Sloppy Joes the Anderson Way

1 1/2 pounds ground beef

1 tablespoon Worcestershire sauce

1/4 teaspoon seasoned salt

1 can Campbell’s Chicken Gumbo condensed soup (do not drain)

Brown the ground beef in a non-stick skillet, drain well. Add the remaining ingredients and keep warm until it’s time to serve. Serve on hamburger buns with “mixed up stuff”.

“Mixed Up Stuff”

1/4 cup mayonnaise

1-2 teaspoons yellow mustard

3 tablespoons ketchup

Mix together the mayonnaise and mustard. Stir in ketchup. Serve with sloppy joes.

Happy Halloween and a recipe for Classic Buttercream Frosting

Posted by Mandy on October 29th, 2010

I hope that you all have a wonderful time this weekend being out and about with all the ghosts and goblins! I’ll be with two princesses and a magician myself, and they are pretty darn cute! :) This past week we have made many yummy Halloween goodies including cupcakes and shaped, decorated sugar cookies. We are already on sugar overload so I thought I’d post a recipe for you all so that you can join us! We just used a box cake mix to make these cupcakes, but I made the frosting homemade. I’ve become somewhat of a frosting snob and usually won’t eat the stuff out of the can anymore. So here’s the recipe I’ve been using for Classic Buttercream Frosting.

Truth be told I was in a massive hurry when I was making these so I didn’t pay attention to what I was doing and left my camera set to all the wrong settings. Therefore I am not posting any progress pictures or step-by-step photos for this recipe. The final phot will just have to do this time around. Sorry folks, but I promise to pay more attention next go round!

Classic Buttercream Frosting

1 cup (2 sticks) butter, softened

3-4 cups powdered sugar, sifted

1/2 teaspoon table salt

1 tablespoon vanilla extract

up to 4 tablespoons milk or heavy cream

Beat butter for a few minutes with a mixer with the paddle attachment on medium speed. Add 3 cups of powdered sugar and turn your mixer on the lowest speed (so the sugar doesn’t blow everywhere) until the sugar has been incorporated with the butter. Increase mixer speed to medium and add vanilla extract, salt, and 2 tablespoons of milk/cream and beat for for 3 minutes. If your frosting needs a more stiff consistency, add remaining sugar. If your frosting needs to be thinned out, add remaining milk 1 tablespoons at a time.

Recipe from: http://savorysweetlife.com/2010/03/buttercream-frosting/

No-Bake Chicken Spaghetti

Posted by Mandy on October 29th, 2010

My grandmother, Mae Mae, was who I learned most of my cooking from. She didn’t follow many recipes, but mainly just cooked to taste as most Southern cooks still do today. She did use a recipe for this one dish though, Chicken Spaghetti. I’m not sure where the original recipe came from, but I think someone gave the recipe to my mom years ago. It’s super easy, and can be adjusted to however spicy and cheesy you want it.

Growing up, we (my brother, my sister, and I) usually worked for my dad at his office a couple days a week and then went to help Mae Mae with her day care the remaining days. No matter what we were doing that day (working or helping Mae Mae), we always had lunch at her house and could count on a hot, delicious meal served up right at noon. Of course, one absolutely HAD to like the soap-opera “All My Children” because it was always on during that hour in her house. Not that you could hear much of what happened with all of the kids running around. Anyway, one day we went to her house for lunch just like we always did. I remember right as we got there Mae Mae was talking about how her Chicken Spaghetti just didn’t taste right that day, and after much discussion about it, she finally figured out she had left out the cheese! We died out laughing and I still die out laughing every time I think about that day. She was always doing funny things like that, but we always loved her for it. I miss my Mae Mae each and every day but every time that I eat this dish I am reminded of that day and it brings tears to my eyes. Cook up some today and share with a friend in need, like I did with this big pot of it that I made.

You’ll need these items:

You can use whatever chicken you have on hand for this. I usually just use boneless, skinless chicken breasts because I buy these in bulk and vacuum seal them. Feel free to use whatever you’d like though. I boil mine with salt and a couple bay leaves for extra flavor. Debone the chicken after cooking (if using bone-in) and chop up. As for the Rotel, you can use either two cans of Rotel or one can Rotel and one can diced tomatoes (like I do). I find that the Rotel is too spicy for my taste to use two cans, but if you like things spicy by all means use both cans Rotel. Chop up all your ingredients…I even chop up my tomatoes into really tiny pieces so that there aren’t any big chunks since my family is full of tomato haters. Shame on them! I could eat tomatoes all day every day! Mix all ingredients in a bowl.

Add all of the ingredients, including your raw spaghetti and chopped chicken (neither of which are pictured above) into a large stock pot and bring to a boil. Reduce heat and simmer until spaghetti is cooked through. Add the cubed cheese and leave on very low heat until melted. Do not leave the dish on the stove too long because the cheese will stick and burn, and your spaghetti noodles will get soggy/too soft.

Chicken Spaghetti

Chicken (whatever kind you prefer, I usually use boneless skinless breasts boiled in water – save broth)

2 cans Rotel*

1 bell pepper, chopped

1 can sliced mushrooms, drained

1 1/2 quarts chicken broth

1 pound Velveeta cheese, cubed

1 onion, chopped

1 tablespoon Worcestershire sauce

2 cloves garlic, minced

12 ounces spaghetti

Cook chicken in water and save broth. Cut meat and mix with Rotel, onion, bell pepper, Worcestershire sauce, mushrooms, spaghetti, garlic, and broth. Simmer until vegetables and spaghetti are tender. Add cubed Velveeta. Simmer and stir until Velveeta is melted.

*Note: When I make this I like to use one can Rotel and one can diced tomatoes.

Southwestern Chicken Appetizers

Posted by Mandy on October 26th, 2010

This appetizer is one of my ALL-TIME favorite foods on this earth. I first tasted this recipe at a Pampered Chef party. My cousin, who is a rep for them, was doing a party here at my house and wanted to know what type of food I wanted to make. I told her that I’d love to make a really good appetizer but I did’t care what. She chose a variation of these (I’ve since changed the recipe slightly to my liking) and I remember thinking, “Is she crazy? That list of ingredients doesn’t sound like anything that I’d like!” Boy am I glad I didn’t tell her that because I fell in love with these! I have since learned to trust her, and am always willing to try the odd-sounding recipes that she shares, and I always end up loving them!

I love making these pretty little things and having them for lunch for a few days in a row. They heat up (in the oven) and taste like they were just made fresh. Serve them with a salad for an even more delicious lunch. Seriously, you can’ t go wrong with these. Try them for your next party or get-together and be sure to let me know what you think!

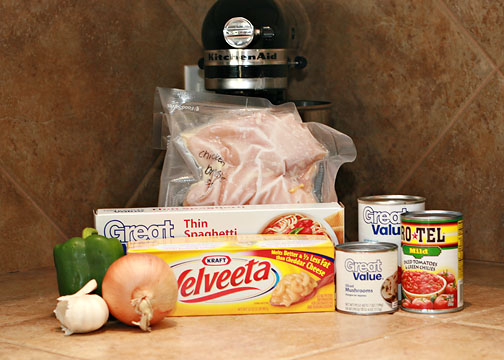
Start with these ingredients. I forgot to put the lime in the photo, sorry!

Start by baking the french bread dough. You can either follow the directions on the package, or my favorite way is to use a bread tube to bake it in so that I end up with these pretty scalloped edges. Slice the bread into 1/4″ thick slices and place, cut side down, on a baking sheet. I like to use my stone for this instead of a sheet because it keeps the bread from getting to crispy, but if you don’t have a stoneware baking sheet a metal one will do fine.

Next, drain your chicken and flake it into a medium-sized mixing bowl.

Add the remaining ingredients, except the cilantro, tomato, and 1/2 cup of the cheese. (Here I used a green bell pepper because that’s what was on sale this week at the store but using a red bell pepper makes this yummy appetizer look even more beautiful on the plate!)

Spread a small amount onto each bread slice and flatten the filling slightly. Top each bread slice with a thin slice of tomato and sprinkle with the leftover cheese.

Bake 15 minutes, or until cheese is melted. Remove from the oven and sprinkle with fresh snipped cilantro. Serve warm.

Southwest Chicken Appetizers

1/3 cup finely chopped onions

1/3 cup finely diced bell pepper

1 clove garlic, minced

1/4 teaspoon salt

1/4 cup mayonnaise (you can use light)

1 (12 oz) can chunk white chicken

1 tablespoon Pampered Chef southwestern seasoning*

1 teaspoon fresh lime juice

2 plum tomatoes, thinly sliced

1 pkg. refrigerated French bread dough

fresh cilantro

Bake bread dough according to package; allow to cool completely. Slice into approximately 1/4″ thick slices and place, cut side down, in a single layer on a baking sheet. Drain and flake chicken into a medium bowl. Add bell pepper, onion, 1/2 cup cheese, salt, mayonnaise, garlic, seasoning mix, and lime juice. Mix until well combined. Spread chicken mixture evenly over bread slices, slightly flattening the top. Top each bread slice and filling with one sliced tomato; sprinkle with leftover 1/2 cup cheese. Bake at 375 degrees, or until cheese is melted. Remove from the oven and top with freshly snipped cilantro. Serve warm.

*Note: If you do not have any of the Pampered Chef seasoning, feel free to use taco seasoning instead.

This recipe is adapted from a Pampered Chef recipe, but I do not know the name of the cookbook as it was e-mailed to me before my party by the PC rep.
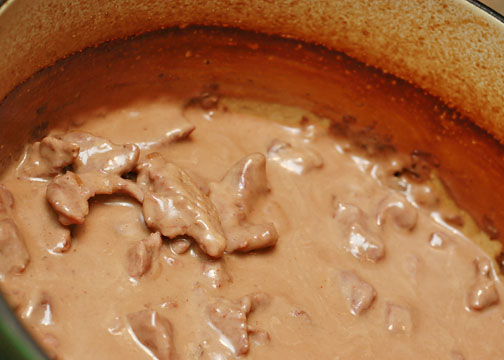
Pecan Pie Cake

Posted by Mandy on October 25th, 2010

Whenever I make a dessert to take somewhere, I try to make it somewhat appropriate to the season. This dessert was always a traditional dish to be served at our office Christmas parties back in the day when I was still working, before my stay-at-home-mom days. I kind of forgot about this dessert after leaving there, but then one Thanksgiving I was trying to think of something “season-appropriate” to take that wouldn’t be like the normal desserts we usually had. This time I wanted to take something to WOW! people and to really show just how good of a cook I could be. That reminded me of this dessert, and how popular it always was in our office. When I first made this dessert, I baked the cake and before crumbling it (like the recipe calls for), I let Matt taste just the bare cake. He immediately fell in love with it! When I told him that I was going to make it even better by adding a frosting to it, he got mad and said, “You’re not going to make it better, putting frosting on that cake will ruin it!” Well little did he know that once tasting this cake fully prepared, he’d have once and for all a dessert that he could officially call his “All-Time Favorite Dessert”. And with him not being much of a sweets person, I couldn’t it. I have made this dessert for numerous get togethers since that day a few years ago, and every single time Matt loves it. I have even caught him before sitting on the couch with nothing but a spoon and the dessert pan! Mark this one down in your favorites, because I promise you will be coming back to it again and again!

To start, you’ll make a cake using the following ingredients.

Start by creaming the butter and sugar together, and then adding the other ingredients. Stir all of this by hand to mix.

Add the pecans last and stir well so that they are all throughout the mixture.

Pour into a 9×13″ baking dish (I use glass) and bake at 350 degrees for 30-40 minutes.

Remove and allow to cool completely. Taste it at this point too, like I did, and you’ll wonder what could possibly make this dessert any better than it already is!

Crumble the cake into a large bowl

Now you are ready to make your frosting with the following ingredients

Make sure that your Cool Whip is thawed and your cream cheese is softened. Whip everything together until thoroughly combined. Spread half of the crumbled cake into the bottom of your serving dish. You can use whatever you’d like. Usually I use a 9×13″ baking dish with a lid, but since I wanted it to look pretty for the photos this time I used a large green serving bowl. Following the first layer of cake, spread half the frosting and repeat layers. Keep chilled until it’s time to serve.

Now get in your car NOW if you know what’s good for you and go get these ingredients because – trust me – you will enjoy this dessert soooooo much more than you think you will! And if you are able to keep yourself from downing the entire bowl yourself, share some with someone else so that they can enjoy it just as much as you did!

Pecan Pie Cake

2 cups granulated sugar

2 sticks butter, softened

1 1/2 cups self-rising flour

4 eggs

1 teaspoon vanilla

2 cups chopped pecans

Cream butter and sugar; add remaining ingredients, stirring by hand. Pour into a 9×13″ baking dish and bake for 30-40 minutes at 350 degrees. Crumble cake; alternate cake and frosting to make two layers of each.

Pecan Pie Cake Frosting

1 lg. container whipped topping

1 (14 oz) can sweetened condensed milk

1 (8 oz) package cream cheese, softened

Blend all ingredients together well using a mixer.

Ranch Veggie Dip

Posted by Mandy on October 22nd, 2010

I must say that this is one recipe that I make probably more than any other recipes. Somehow dipping fresh cut veggies into just plain ranch dressing out of the bottle doesn’t entice me like this dip does. This dip is thick, creamy and delicious! This is a must at every single party that we ever throw (and with 3 kids, we throw a lot!) My favorite way to serve this dip is with fresh cut veggies (think broccoli, cauliflower, carrots, bell pepper, squash) but it is also yummy served with plain chips also. To make it even better, this is made out of ingredients I always have on hand and it’s the easiest thing in the world to throw together. You can also make this healthier by using light ingredients as opposed to full fat mayonnaise and sour cream. Trust me, no one will know the difference!

Mix all ingredients together and serve cold with fresh cut veggies and/or chips and crackers.

Ranch Veggie Dip

1 cup mayonnaise

1 cup sour cream

1 packet dry Ranch dressing mix (NOT dip mix)

Mix all ingredients together and chill for a couple of hours before serving. Serve with fresh cut veggies and/or chips and crackers.

Megan’s Chicken Salad

Posted by Mandy on October 22nd, 2010

Megan, as spoken of in the above title, is my little sister. She’s not much of a cook, to say the least. She owns her own home but has probably only used the oven a total of 5 times since moving in 4 years ago. I think she lives solely on turkey sandwiches and whatever I happen to be cooking. As a matter of fact, she was put in charge of making a Pecan Cheesecake Pie for Thanksgiving one year, and well…she fell asleep while it was baking and ended up cooking it for 2.5 hours when it was only supposed to be cooked for about 45 minutes. The worst part was that she still brought it to dinner and got her feelings hurt when no one wanted to taste it! She also made a buttermilk pie one time that was so liquidy we called it buttermilk soup! She isn’t extremely gifted in the culinary department, but there is one thing that she can make and she makes it very well. Her chicken salad. It’s so yummy that I craved it when I was pregnant with my youngest and made her make it on several occassions. It’s absolutely delicious and so easy! Since you aren’t lucky enough to have her in your home to make this for you, I thought I’d share some photos of her making it so that you all can make it in your homes too!

Start with the following ingredients: chicken, mayonnaise (we use Canola because it’s healthier than the full-fat version), celery, onion, a touch of mustard, salt, and pepper. You can also add some chopped sweet pickle if you’d like, but we forgot to add it this time.

Open your cans of chicken and drain off all the juice. Chop finely with a chopper (or knife) and place in a large mixing bowl. And yep, that’s her doing all the chopping!

Chop up your celery and onion; add it into the mixing bowl and stir to combine. I’m adding this photo strictly for comical purposes. She was slicing the onion in these really thin slices and then using the chopper to chop it up. I was laughing hysterically at her because she thought that was all she could chop at a time. I chop a entire half onion at a time! I couldn’t help but take a photo just to share with all of you cooks out there. I still love you Meg, even if you don’t have excelling kitchen skills!

Add mayonnaise, just enough to coat all of the ingredients and make a consistency that you like. Start out with less than you think you’ll need because you can always add more but you can’t ever take it out once you’ve added it. We probably used about 3/4 cup for ours. Also add just a touch of mustard at this point. We used about a teaspoon.

Add salt and pepper, to taste.

And it’s that easy, you’re done! Serve either on a sandwich roll or with crackers for a yummy lunch!

Megan’s Chicken Salad

2 cans chunk chicken breast, drained & chopped

2 stalks celery, chopped

1/4 onion, chopped

3/4 – 1 cup mayonnaise

1 teaspoon yellow mustard

salt & pepper, to taste

Mix all ingredients well. Serve as desired.

Sausage Balls

Posted by Mandy on October 20th, 2010

That’s a pretty bold statement, but I really mean it…never in my life have I ever tasted a sausage ball that is quite this good. And trust me, I’ve tried a lot. If I’m at a party and see sausage balls, I can’t help but grab a few and I’m always disappointed. They just never quite have the flavor that these do. You know how food has a way of bringing back memories? Well these take me back like nothing else can. When I think of these I remember my sweet, sweet grandmother Mae Mae who always made these. I still remember the Tupperware container (the green one with a whitish lid that is made for storing celery) that she’d store them in the refrigerator. We’d come in after school and heat up a few (okay, so maybe it was like 10, HA!) and pour us a big huge glass of sweet tea. I no longer even drink sweet tea much but when I’m eating these, it has to be with a big glass of nothing BUT sweet tea. What I wouldn’t give to share another afternoon at my Mae Mae’s, telling her about the going-ons of school while sharing this snack. She missed meeting my first child by just 3 weeks and 4 days, but I know that she is looking down on me each and every day. I’m sure she’s smiling down as I bake these in the oven and think of her.

Speaking of…so many foods bring back memories for people. I’d love to hear some of your stories and recipes that have these same emotions for you. Please post a comment or shoot me an e-mail to mandy@thesupermomchef.com. I may just find that your recipe is so delicious that I need to blog about it here!

Now onto the reason why you are really here. Sausage balls. You’ll see many recipes out there that call for numerous other additions but trust me, no addition is needed. These three ingredients pack enough flavor in these little balls!

Feel free to use whatever kind of sausage and cheese you’d like. These were the items that were on sale at my grocery store so that’s why I went with these particular flavors. It’s also delicious to use half regular sausage and half hot. That gives them a little more spice. Pour all of your ingredients into a bowl and using your hands (trust me, a spoon won’t work) mix them all together. It’s best to sit down and do this because it’s going to take a while. In the photo below that my sweet sister took (thanks, Meg!) I was sitting on the couch and watching the Food Network while mixing. :) Make sure to use a pretty big bowl too or else you’ll end up with baking mix all over the place.

You’ll eventually end up with a huge ball of sausage dough that looks something like this

This is the point where I usually preheat my oven. If you preheat it before you start, you’ll end up having it on a long time and let’s face it…down here in the South you don’t want to run an oven any longer than you have to. It’s hot enough already! Gather your baking sheet. I usually use my stoneware for this because it seems to keep the balls from getting too crispy. A regular baking sheet would work, though, if that’s all that you have. Whatever you use, make sure it has rimmed edges. Just trust me on that one. You DON’T want to make the mistake that I did. These babies will definitely drain off some grease and you want something there so that it doesn’t run off into your oven leaving a mess that will take you forever and a day to clean up. Pinch off your dough and roll each pinch into a tightly rolled ball, about 1 – 1 1/2″ in diameter. Place on a baking sheet side by side. It’s okay, and actually ideal, if they touch.

Bake at 350 degrees until golden brown and sizzling.

Now this is the hard part. Trying to keep my kid’s little finger off these puppies until they’ve had time to cool off just slightly. They see this pan sitting on the stove cooling and they just want to dive right in! They are so good that they just can’t help themselves. Honestly, I can’t either so I sneak a ball or two and have them right away when they kids aren’t looking. Bad Momma! After about 5 minutes or so, remove them to a plate or serving platter to cool completely before refrigerating. Since I don’t have a perfect little Tupperware dish like Mae Mae did, I usually just throw mine in a zip-close bag. Pull them out as you need them and microwave for a few seconds. They taste just as good as when you just cooked them!

Sausage Balls

1 pound breakfast sausage (your choice of flavor – hot or mild)

1 pound cheddar cheese, freshly grated (DO NOT use the pre-shredded)

3 cups Bisquick baking mix

Mix all together and roll into 1″ balls. Bake at 350 degrees until golden brown.

Peanut Butter Oatmeal Chocolate Chip Cookies

Posted by Mandy on October 19th, 2010

Does that sound like heaven or what? Peanut butter alone is enough to draw my attention, but add into that chocolate chip and you simply cannot go wrong! Adding the oatmeal just takes it completely over the top. As you’ll soon find out, I’m a huge cookie fan. I could literally live off of chocolate chip cookies alone. Nothing in this world to me tastes quite that good. Yum, yum, yum…did I say yum? When I saw this recipe, I knew immediately that I just HAD to try it. The dough alone is absolutely divine, so I knew the cookies would be too. The combination of all these ingredients is simply superb. I’ll advise you ahead of time not to use this dough to make some scrawny little cookie. That would be a huge mistake! Make big chewy cookies out of this and you won’t be sorry! I personally used 1/4 cup of dough for each cookie. The easiest way to measure is simply with a 1/4 cup cookie scoop. That way you ensure that each cookie is the same size, and also will bake equally. Try and see if you can resist eating every last one of these…I know I couldn’t!

Start with the following ingredients: sugar, flour, peanut butter, butter, chocolate chips, vanilla, brown sugar, oatmeal, salt, egg, and baking soda.

In a small bowl, mix together the flour, baking soda, and salt. Set aside. Cream together the butter, brown sugar, sugar, vanilla, and peanut butter. Add the egg and beat to combine. Gradually add the flour, just until combined. Stir in the oats and chocolate chips. Using a cookie scoop, drop dough onto parchment paper lined baking sheets, making sure to leave room for them to spread.

Bake until lightly golden, about 10 minutes. Cool completely on a baking rack.

I bet you wanna make them now don’t you???

Peanut Butter Oatmeal Chocolate Chip Cookies

1 cup all-purpose flour

1 teaspoon baking soda

1/4 teaspoon salt

1 stick (1/2 cup) unsalted butter, at room temperature

1/2 cup creamy peanut butter

1/2 cup granulated sugar

1/3 cup light brown sugar

1/2 teaspoon vanilla extract

1 egg

1/2 cup rolled oats

1 cup semi-sweet chocolate chips

Preheat oven to 350 degrees. Line two baking sheets with parchment paper and set aside. Whisk together the flour, baking soda and salt; set aside. On medium speed, cream together the butter, peanut butter, granulated sugar, brown sugar, and vanilla extract, about 3 minutes. Add the egg and beat to combine. On low speed, gradually add the flour until just combined. Stir in the oats, and then the chocolate chips. Use a large cookie scoop and drop dough onto prepared baking sheet about 2″ apart. Bake for 10 minutes, or until the cookies are lightly golden. Cool completely on the baking sheet and then store in an airtight container at room temperature.

Originally recipe found here: http://www.browneyedbaker.com/2010/02/24/peanut-butter-oatmeal-chocolate-chip-cookies/