Green Bean Bundles

Posted by Mandy on November 22nd, 2010

A couple years ago, my mother and I put together a cookbook that was sold to help raise money to pay for my son’s expenses related to his medical problems (he’s had 15 surgeries and all have to be done halfway cross the country). One of the recipes submitted by a long time family friend was the most delicious green bean bundles you’ve ever tasted. I have adapted that recipe in just the slighest way here, but they are just as delicious. I made them for the first time last Christmas, and they were a wonderful hit! My nephew even requested this recipe again this year because he loved them so much! I am extremely grateful for having been shared this recipe, and I hope your family enjoys these yummy green beans as much as my family does!

Start with these items (plus garlic salt and water, which I forgot to add to the photograph):

Drain your beans and put them on a plate. Cut each strip of bacon into thirds. Wrap 5-8 green beans in each piece of bacon and secure with a toothpick. Place side by side into a small baking dish.

Melt butter; add brown sugar and water. Pour mixture over the prepared bundles.

Sprinkle liberally with garlic salt. Bake at 325 degrees for 30-40 minutes or until bacon is browned. Makes 6-8 servings.

Green Bean Bundles

1/2 pound sliced bacon

2 (14 oz) cans whole green beans

4 tablespoons margarine or butter

1/2 cup firmly packed light brown sugar

3 tablespoons water

garlic salt

Preheat oven to 325 degrees. Drain the green beans. Cut each strip of bacon into thirds. Wrap 5-6 green beans in each piece of bacon, wrapping the bacon around the beans. Secure each with a toothpick. Melt the butter; add the brown sugar and water. Pour over the bean bundles. Sprinkle the bundles generously with garlic salt. Bake for 30-40 minutes, or until the bacon is browned. Makes 6-8 servings.

Green Bean & Corn Casserole

Posted by Mandy on November 19th, 2010

Green bean casserole is one of those classic Thanksgiving/holiday casseroles you see on most tables, but you won’t see that on ours. We always opt for this casserole instead because it is full of flavor and so easy! Actually, to be completely honest, in our family we call this “Death Casserole”. It sounds like a bad name (in that the casserole might kill you or something), but it actually is called that because my Mae Mae used to make this and take it to each family that lost a loved one. She become known for her casserole, and we still laugh about it every time we think about her making it. Try this for your holiday gathering and give that old green bean casserole the boot!

Start with a few ingredients:

Start out by sauteing your bell pepper, onion, and celery until all are soft. One thing that I feel I should mention here is that these are the same items we always put in our homemade cornbread dressing, so if you’re planning on making it as well, save yourself the trouble and go ahead and saute enough for both dishes all at once!

Mix together all ingredients except the Ritz crackers and butter.

Pour into a small casserole dish (I used a loaf pan for mine). Take the roll of crackers and crush it right in the package. No need to mess up a zipper bag and waste that money! Pour on top of the casserole mixture. At this point, you can melt the butter and pour it over the cracker crumbs. I, being somewhat health conscience, choose to forgo the butter and use butter spray instead. Who wants to eat all the butter floating around in the dish anyway? Trust me, you won’t need it. It’s creamy and delicious enough without all those extra calories and fat grams.

Bake at 350 degrees for 45 minutes, or until the dish is hot and bubbly around the edges.

Yummy!

Green Bean & Corn Casserole

1 (15 oz) can shoepeg corn, drained

1 (15 oz) can French style green beans, drained

1/4 cup bell pepper, chopped

3/4 cup grated sharp Cheddar cheese

1 stick butter, melted (I substitute butter spray in place of butter)

1/2 cup chopped celery

1/2 cup chopped onion

1 (8 oz) carton Sour Cream

1 can condensed cream of celery soup

1/2  row butter flavored crackers (out of the regular size package, I use only one row of the new “Fresh Stack” packages)

salt & pepper, to taste

Saute celery, onions, and peppers over medium-high heat until soft. Crumble the crackers. Mix together the corn, beans, onions, peppers, celery, soup, sour cream, cheese, salt, and pepper. Pour into a small casserole dish. Sprinkle the crumbled crackers over the mixture. Pour the butter over the top (or spray with butter spray). Bake at 350 degrees for 45 minutes, or until hot and bubbly.

Bread Pudding with Hard Sauce

Posted by Mandy on November 19th, 2010

Oh my gaaaahhh! Every single time that I make this dessert (which is usually only at Thanksgiving and Christmas) I am reminded of how absolutely wonderful it is. Words truly can’t describe it…one must just try this to believe me! My dad is probably the biggest bread pudding fan I’ve ever met before, and I’ve made many, many versions of bread pudding trying to find just the right recipe we were both looking for. After never finding the recipe in a book, I decided to come up with my own version. And he says that this bread pudding is as good as any he’s ever had! And trust me, he’s tried it at most places he’s been if they offer it. That comment meant a lot to me, because my dad is a man of few words so for him to tell me something like that really means something. I hope that I am able to have many, many more holidays sharing this dessert with my sweet daddy!

Just a few basic things, most of which you’ll already have on hand probably:

Start by tearing the french bread into big chunks and dropping them into a large mixing bowl (one that you can do without while you refrigerate the mixture you’re making). Pour the half and half over the bread and allow this mixture to sit at least a few hours, but overnight is best. Once the mixture has sat, and the bread is soaking up all that yummy cream, remove from the fridge.

Add the remaining ingredients to the bread and cream mixture.

Pour the mixture into a prepared 9×13″ baking dish that has been sprayed with non-stick cooking spray. You can also use a little larger dish, if you’d like for the pudding to be thinner (and usually it tends to serve more people that way).

Bake at 350 degrees until it’s ready! When you remove it from the oven, it will be big and puffy like this.

Within just a few minutes, it will deflate and sink down like this. And that’s okay! Trust me, it’s still going to be one of the most delicious things you’ve ever tasted!!!

Now it’s time to make your hard sauce, which is really just a more proper term for whiskey sauce. :) Truth be told my daddy is a JW Dant kind of man, but my hubby is more of a Jack Daniels man so that was what I had on hand. I don’t think my dad even noticed the difference because either way it’s delicious! Here’s what you’ll need:

Add your butter to a saucepan and start melting it.

Meanwhile, blend together the remaining ingredients and add to the butter. Whisk constantly until completely combined, and then allow the mixture to simmer over low heat until it’s all melted together, sticky, and yummy!

Serve hot and get ready for some kisses (and recipe requests!) because everyone around you is gonna LOVE this dessert!!!

Bread Pudding with Hard Sauce

1 loaf French bread

1 quart half and half (fat free works well)

2 1/4 cups sugar

1 teaspoon vanilla extract

1 stick butter, melted

3 eggs

Break apart the loaf of bread into bite size pieces. Pour half and half over the bread pieces and soak at least a couple hours in the refrigerator, but overnight is best. Blend melted butter, eggs, sugar, vanilla with bread mixture. Pour into a 9×13″ dish that has been sprayed with non-stick cooking spray. Bake at 350 degrees for one hour, or until the center springs back. If you shake the baking dish, the pudding will appear wiggly like gelatin. Serve topped with Hard Sauce.

Hard Sauce

1 stick butter, melted

1 cup sugar

1 egg

1 tablespoon vanilla extract

*1-2 tablespoons whisky (or more, if you prefer…I usually just pour some in without measuring)

Blend all ingredients and simmer for a short while until mixture is all combined and melted together. Pour over warm bread pudding.

*Note: You may substitute other artificial flavorings such as butterscotch, almond, or rum for the whiskey if you’d prefer. You may also add pecans to the sauce for something different.

Homemade Cornbread Dressing

Posted by Mandy on November 16th, 2010

A few days ago I posted on my Facebook asking which recipes my friends would most like to see recipes for with the upcoming Thanksgiving holiday. The most asked for item was homemade dressing/stuffing. Well, I don’t have a stuffing recipe because that’s just something we’ve never made in my family to date. At least not that I remember. But, I do have this wonderful, delicious, moist, delicious, tasty, delicious…did I say delicious? Ah well…it’s just THAT good! It’s not your traditional dressing recipe, in that it doesn’t call for any poultry seasoning, sage, turkey, or thyme (or any other fancy spices for that matter). It’s just plain old cornbread dressing. My hubby is super picky when it comes to his food. There better not be any items in his meals that include crunchy onions or peppers, so this dressing is right up his alley! So much so that when we attend Thanksgiving at his own mom’s house, he requests that I bring this along with us because he thinks mine is better! I still can’t believe he told me that! So I made a pan this week to show you all how I do it. And John Matthew (my 6 year old) is crying right now as I type this because he just realized there are no more leftovers because what we did have I sent to work with my hubby for his lunch today. Oops! Guess I better make another pan!

Oh, I almost forgot to tell you that I’m also including a recipe for gravy for the dressing. I particarly think that the dressing is delicious as-is (that’s why you won’t see photos of how to make this), but some people prefer having a gravy. This was Mae Mae’s recipe for gravy. I still remember writing it down as she told me how to make it.

You only need a few things, simple but tasty is what’s it’s all about!

In the above photo you’ll see that I’ve already chopped my onions, peppers, and celery. I like to do that in the beginning because that’s the most difficult part of the recipe to me. I hate chopping so I use a handy “chopper” to do the dirty work for me. I did cry a while though…those dang onions burned my eyes BAD! Also go ahead and boil some water and follow the directions on the bullion package to make about 6 cups of chicken broth. You can also use the store bought kind, but I’m “low on the dough” lately so this is the cheaper route for me. Also go ahead and crumble your cornbread and biscuits together. To make our biscuits, we just make one recipe of the Bisquick drop biscuits. Mae Mae has even been known to make one single HUGE biscuit, since she would just be crumbling it up anyway she didn’t care how it looked. Smart lady! I usually use 1 pan of cornbread also. It doesn’t matter if you don’t have an entire pan, or an entire recipe of biscuits. Just make do with what you’ve got. No one will ever know the difference! In a large non-stick skillet, melt about a half stick to a stick of butter, depending on how much onions, peppers, and celery you want to add. Place the onions, bell peppers, and celery in the pan.

Cook over medium-high heat until soft and tender.

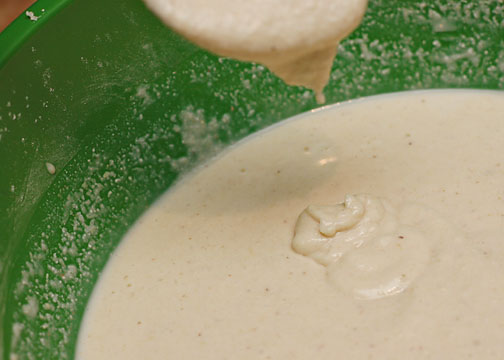
Pour the pepper, onion, and celery mixture into the bread mixture and mix well.

Place in the refrigerator. It’s best to leave this mixture to sit at least overnight, but if you only have a couple of hours that’s okay. The longer you allow it to sit, the more flavor your dressing will have. When you are ready to make your dressing, add your eggs into the bread and vegetable mixture. Add chicken broth and stir. You can add however much chicken broth you’d like. Obviously, the more you add the more moist and flavorful the dressing will be, but it’ll also make you have to cook the dressing longer so that you don’t end up with a watery dressing. Gotta cook out most of the liquid before serving! I like to add chicken broth to mine until moist, but not liquidy.

Add salt and pepper to taste; stir to combine.

Pour into a prepared baking dish. It doesn’t matter what kind you use. I used my Pyrex dish just because it was already out, but whatever kind you have on hand will work.

Place a few small pats of butter on top of the dressing mixture (which I forgot to photograph for you). Bake at 350 degrees until just set. Serve while still hot. If you’re lucky you’ll have enough for leftovers because this dish only gets better with time!

Homemade Cornbread Dressing

1 recipe Bisquick drop biscuits, prepared according to package

1 pan of cornbread (here’s my favorite recipe: http://www.thesupermomchef.com/?p=252)

1-2 onions, chopped

6-8 stalks celery, chopped

1-2 bell peppers, chopped

1 stick butter

6 eggs, beaten

salt and pepper, to taste

Crumble cornbread and biscuits into a large bowl. Melt 1/4-1/2 cup butter (depending on how many vegetables you plan to use…the more veggies you use, the more butter you’ll need) in a large non-stick skillet over medium-high heat. Add vegetables and saute until tender and soft. Pour the vegetable mixture into the crumbled bread mixture. Refrigerate at least a couple of hours, but up to two days. When you are ready to cook your dressing, add the beaten eggs into the bread and vegetable mixture. Stir to combine. Add enough chicken broth to make a moist mixture, but not a liquidy mixture. You want enough liquid to keep the dressing moist and delicious but not so much that you have to cook it for too long to get rid of extra liquid. I usually add 2-4 cups, depending on how much bread mixture I have. Add salt and pepper, to taste. Pour into a greased baking dish, and top with small cubes of butter all over the dish. Bake at 350 degrees until golden brown and set.

Gravy for Dressing

broth from chicken

cornstarch

2 hard-boiled eggs, chopped

Bring the chicken broth and eggs to a boil; thicken mixture with cornstarch.

Mae Mae’s Homemade Cornbread

Posted by Mandy on November 16th, 2010

I know, I know…you’ve probably heard Mae Mae’s name mentioned at least once in every single post I’ve written. But truth is, almost everything I know about cooking I learned from her. She was the QUEEN of cornbread. I remember helping her in her day care and every single day there was a pan of this cornbread sitting on her table at lunch time. Being able to be the “cornbread maker” meant you had truly arrived…you were no longer there just because you had to be with a sitter (she had a day care), it meant that you were there to actually HELP babysit the other children. Only the most helpful ones got to help in the kitchen! I even have her old black skillet that I still use for making my cornbread here at home. There are a million ways to enjoy cornbread…hot right out of the skillet with some butter melted on top, crumbled into soup vegetable soup, crumbled into a glass of buttermilk (that’s what Mae Mae used to do with hers), crumbled to make cornbread dressing. The list is endless! Without further blabbing, here is how to make it. :)

The star ingredients:

Start by placing a seasoned cast iron skillet on medium heat, with about 3-4 tablespoons of oil in it (I forgot to take a photo of this step, sorry!). While that gets hot, proceed with making your cornbread mixture. Mix together the dry ingredients. Add in your egg and mayonnaise. Add in about a cup of milk and start stirring to combine.

Keep stirring and adding milk until you have an appropriate mixture. You don’t want it to thick or else you’ll end up with dry, crumbly cornbread.  It will probably take more milk than you’d imagine it will…at least mine always does. I like to add milk to mine until about this point…where when I drop a spoonful back into the mixture it stands up a little bit but sinks into the other mixture within just a few seconds.

Once you have your cornbread mixture ready, check to see if your oil is hot. I like to heat mine ALMOST to the point that it’s smoking. You can usually smell it at that point also. Pour most of the hot oil into the cornbread mixture, leaving about 1 tablespoon in the skillet. This will sort of “fry” the edges of the cornbread and make for a crispy outside crust. Mix together the cornbread mixture until the oil is completely incorporated. Pour the mixture into the hot skillet. Bake at 350 until the middle is firm. Now this is where it gets a little confusing. We like to brown the top of ours, so I’ll show you how. Take the hot skillet and a dinner plate and place them side by side. Dump the hot cornbread onto the platter upside down, like this:

Now take the plate and slide the cornbread slowly into the skillet.

You’ll end up with your cornbread inside the skillet, with the top being turned downward, like this:

Place it back into the oven for a short while, about 5 minutes. Remove and dump out onto the plate. Now you’ll have a perfectly browned pan of cornbread.

Slice and serve!

Mae Mae’s Homemade Cornbread

1 3/4 cups self-rising corn meal

1 cup all-purpose flour

1 tablespoon mayonnaise

1 large egg

milk, however much you need

3-4 tablespoons vegetable oil

Preheat oven to 350 degrees. Place a cast iron skillet with the oil in it over medium heat. Allow to come to temperature while you are making the cornbread mixture. Mix together dry ingredients in a medium-sized mixing bowl. Add egg and mayonnaise; add about 1 cup milk and stir to combine. Continue adding milk until desired consistency. I like mine to be thin enough so that the cornbread isn’t too dry and crumbly. To do so, add milk and mix until when you spoon some on top of the mixture you wind up with a little mound of dough that gently sinks back into the remaining mixture within a few seconds. Add most of the oil into the cornbread mixture, leaving about 1 tablespoon in the skillet. Pour the cornbread mixture into the pan. Bake until the middle is firm, flip the cornbread using a plate for assistance (see photos above), to brown the top. Bake an additional 5 minutes. Remove to a plate to slice and serve.

Pumpkin Pie

Posted by Mandy on November 16th, 2010

What’s more Thanksgivingy (that’s a word, right?) than Pumpkin Pie? Not much that I can think of. Although when I think back to Thanksgiving when I was growing up I don’t remember ever having it. Then again, that was always the time of year when our family took our yearly vacation. When I was small we’d go visit family in Texas, and then as I got older we always went to Branson, Missouri to stay in my grandfather’s condo. My goodness was it beautiful that time of year with all of the gorgeous lights! Anyway…back to cooking, this pie is super simple and absolutely delicious. The recipe for this pie was found in an old cookbook of my grandmother’s. My sister and cousin were sitting around at my Mae Mae’s one day and got the inkling to make something, pulled out the cookbook and found this recipe. The cookbook is no telling where now so I can’t give credit for the original recipe. The one and only problem that I have with this recipe is that it uses 1 cup of pumpkin and I never have known what to do with what’s leftover in the can, so this last time I used the remaining pumpkin to make a second pie. I just cut the milk back a little for the second pie so that it wouldn’t be so liquidy. If you’re looking for a delicious pumpkin pie to make for you holiday gathering next week, make it this one and you’ll impress your family without having to do much work at all. :)

You know the drill…get out all of your ingredients.

Mix together all ingredients except for the pie shell. Excuse the yellowish lump things in my mixture. I didn’t completely melt the butter, so I had a few itty bitty chunks in mine. Don’t worry if that happens…it’ll melt while it’s baking and taste just fine!

Pour the mixture into your pie shell.

Bake for 45-50 minutes until knife inserted in the center comes out clean. I baked two at once, because I didn’t want to waste the leftover pumpkin. And so I could take one to a bake sale and keep the other for myself. :) You’ll also notice I  baked mine on a baking sheet, just in case anything cooked too high and fell out of the pie shell.

Remove and try to allow the pie to cool…but you won’t be able to. It smells to yummy to force yourself to wait that long!

Yummy! I think I’ll go eat what I still have in the fridge still!

Pumpkin Pie

1 cup pumpkin puree

2 eggs, beaten

1 teaspoon ground cinnamon

1 teaspoon ground ginger

1 tablespoon butter, melted

1 cup whole or 2% milk

1 cup sugar

1/2 teaspoon salt

1 9″ frozen pie shell

Preheat oven to 425 degrees. Combine all ingredients except pie shell in a large bowl. Pour into pie shell. Place pie pan on a baking sheet to catch any runovers and bake for 45-50 minutes, or until knife inserted in the center comes out clean.

Moist & Delicious Roasted Chicken

Posted by Mandy on November 11th, 2010

As a mother of three little ones, I am reminded each and every day of just how expensive raising kids is. They are always needing something new whether it be shoes, clothes, diapers, whatever. The list never ends! Therefore I have become a pretty frugal shopper, especially when it comes to groceries. When things are on sale, that item automatically finds its way to our dinner table that week. This recipe is one of those recipes that you can make no matter what’s on sale, because the ingredients are few and things that you keep on hand. The chicken itself would need to be bought fresh, of course, but whole chickens are usually not much at all. As you can see in my photo, I found this one for just over $4. We ended up making two meals out of this one chicken by taking the leftovers after the first night, chopping the chicken and putting it in a soup the following night (I’ll post that recipe tomorrow hopefully). In addition to being very inexpensive, it’s also delicious! Actually the first time I made this chicken for dinner Matt said it was so juicy that he didn’t believe I made it myself! He kept saying that it had to be a rotisserie chicken from our favorite deli. To top it all off, it’s actually a really healthy chicken to serve your family. You can’t lose with this recipe!

You’ll only need a few things:

Start out by rinsing your chicken, and then dry it off really well with a paper towel. Go ahead and take out those nasty innards that come inside of it, because you don’t need those. Can’t imagine anyone would really eat that stuff anyway. Ugh. Place the cleaned chicken into a large Dutch oven. I like to put a little olive oil in the bottom of my dish just so that the chicken doesn’t stick too bad to the pan. It doesn’t matter which side you cook it on, I’ve done both and never had a problem with either.

In a small bowl, mix together the honey and spices.

Now back to the chicken…cut little bitty slits all over the skin of the chicken, being careful not to cut the meat of the chicken. You just want a small little pocket of space between the skin and the meat where you can put your seasonings.

Using either a small spoon or your finger, add a small amount of the seasoning mixture inside of the slits in the skin. Try to rub it all around inside the skin as much as you possibly can, so that all of the chicken will be seasoned.

Top the Dutch oven with foil.

Bake for about 50 minutes and then remove the foil. This is what mine looked like at that point.

Bake for another 50 minutes or so, or until the juices run clear. Remove to a plate/platter and let it rest for about 15 minutes before slicing.

Don’t worry about the skin being so dark…you don’t eat it anyway. Leaving the skin on keeps the chicken as moist as possible while baking, but to save fat and calories it’s best not to eat it.

Serve in any fashion you choose. We like to just pull ours off the bone and eat it.

Moist & Delicious Roasted Chicken

1 whole roasting chicken (4-5 pounds)

1 1/2 teaspoons seasoned salt

2 teaspoons honey

1/2 teaspoon dried thyme

1/2 teaspoon ground cumin

Rinse chicken well and pat dry. In a small bowl, combine seasoned salt, honey, thyme, and cumin. Using a small, sharp knife, make several slits in the chicken skin. Do not cut into the meat. Using your fingers, rub chicken all over (underneath skin) with spice mixture. Use all of the spice mixture. Set chicken on a rack in a Dutch oven. Cover loosely with foil and roast at 400 degrees for 60 minutes. Remove foil and continue to roast chicken for 45 more minutes, or until juices run clear. Remove to a plate or platter and allow chicken to rest for 15 minutes before carving. Remove skin before serving.

This recipe is adapted from the recipe titled “The Whole Chick and Caboodle” in the cookbook titled Crazy Plates by Janet & Greta Podleski

Homemade Chili

Posted by Mandy on November 10th, 2010

I never realized just how easy chili was until I decided to make my own one day when I didn’t have any of the packets of chili seasoning. I have always just used the packets because I assumed I’d need a thousand spices that would just cost extra money and take up room in my spice cabinet. That couldn’t be any further from the truth! The ingredients that you need to make a delicious homemade chili could very well be hiding in your cabinet as well! For this recipe, I just kind of threw things together and didn’t photograph as I was going because I wasn’t sure how it would turn out. I wish now that I’d have taken photos along the way so I’d have more than just the finished product to show you all. I really can’t say how easy this chili was, but I can say that if you try it you won’t be disappointed. This chili is especially good for picky eaters who don’t like “chunks” (aka tomatoes, onions, peppers, etc.) in their food. Those type of people are abundant in my house. *rolls eyes* I threw this all together in a matter of minutes and just let it simmer throughout the afternoon. Serve with some hot cornbread…we made homemade Mexican cornbread to eat with ours. I’ll be sure to share that recipe at a later date. In the meantime, make this tonight and your family is sure to enjoy it!

Homemade Chili

2 pounds ground beef (I like to use lean but feel free to use whatever you prefer)

1 onion, chopped very fine

3 cups water

3 beef bullion cubes

1 teaspoon oregano

2 tablespoons chili powder

1 1/2 teaspoons salt

1/2 teaspoon black pepper

1 teaspoon cumin

1 (6 oz) can tomato paste

1 can kidney beans (dark or light), drained

In a large Dutch oven, brown the ground beef and onion; drain to remove an excess fat. Return the beef to the Dutch oven and add the water, beef bullion, tomato paste, oregano, chili powder, salt, black pepper, cumin, and beans. Simmer on low for a while (I like to simmer at least an hour or two for the best flavor). Serve hot with any toppings of your choice including cheddar cheese, sour cream, and chopped onions.

Pumpkin Bread

Posted by Mandy on November 10th, 2010

In honor of my sweet Momma who had surgery today, I’m posting one of her all time BEST recipes, at least in my opinion. This bread is absolutely delicious and the recipe originally came from my great great Aunt JuJu, so no telling how old it is. This bread always reminds me that the holidays are coming soon. At the first sight of the canned pumpkins showing up on displays in stores, I have to snatch up about 6 cans and make a ton of this bread. It’s THAT good! My favorite memory of pumpkin bread is at breakfast time. During the holidays in the South, most men are in and out of the house quickly because it’s deer season. My husband, Matt, is no exception. He usually stays at deer camp the night before Thanksgiving, and I stay with my mom at her house to wake up early (okay, so honestly I sleep late) and help her make a delicious spread for lunch. She always has a fresh loaf of this ready and waiting for me! Moist, delicious and just plain yummy!

Here’s what you’ll need:

Cream the butter; add sugar and beat well. Add eggs, one at the time to creamed mixture. Stir in vanilla. In a separate bowl, mix together flour, baking soda, sugar, cloves, salt, cinnamon, baking powder, and nutmeg. Add the dry ingredients and pumpkin alternately into the creamed mixture.

Spray two loaf pans with non-stick spray and sprinkle with sugar. I like to take this extra step because it gives the loaves a yummy crunchy texture on the crust.

Divide the dough evenly into the two loaf pans. Bake at 350 for one hour, or until toothpick inserted into the center of each loaf comes out clean.

I like mine best the following day with a delicious cup of hot chocolate! I have a serious problem stopping at just one slice…

Pumpkin Bread

1 cup butter or margarine, softened

3 eggs

1 teaspoon baking powder

1 teaspoon salt

1/2 teaspoon cloves

1 (16 oz) can pumpkin puree

3 cups sugar

3 cups all-purpose flour

1 teaspoon baking soda

1 teaspoon cinnamon

1/2 teaspoon nutmeg

1 teaspoon vanilla

Preheat oven to 350 degrees. Spray two loaf pans with non-stick cooking spray and sprinkle lightly with sugar. Cream butter; add sugar and beat well. Add eggs, one at the time to creamed mixture. Stir in vanilla. Mix together all of the dry ingredients. Alternately add the dry ingredients and eggs to the creamed mixture. Pour the dough into the prepared pans, dividing evenly. Bake at 350 degrees for an hour, or until a toothpick inserted in the center of each loaf comes out clean.

Southern Homemade Macaroni & Cheese

Posted by Mandy on November 5th, 2010

I have never had the honor of preparing the entire Thanksgiving meal myself (turkey, dressing, etc.) but I do have one particular honor every year in my family, and that is bringing the homemade macaroni and cheese.  I remember the first time I made it and my niece made a comment about how she didn’t like it, and my feelings were hurt. My dad chimed in and said something along the lines of this, “You don’t know what real macaroni and cheese is! You’re used to the blue box kind, but THIS is real macaroni and cheese! This is the old Southern way!” That’s when I realized that he was right. Many people nowadays (yes, that’s a word, at least where I live) don’t even know how to make macaroni and cheese unless it comes out of a box. Up north, from what I understand, they like to make it with sauce made of flour, butter, and cheddar but down South we like to make ours with eggs. In my dreams, heaven is filled with yummy good old Southern goodies like this and I get to eat as much as I want without ever gaining an ounce. Ahhhhh…. Anyway, back to reality. Make this for your family this Thanksgiving and it’s a promise from me that most everyone (except little weirdo kids that don’t know the good stuff) will love it!!!

Start with only a few things:

Boil a large pot of water to cook up your noodles, drain them after they are al dente (“to the bite”). You don’t want them too done because they will continue to cook some in the oven.

In a baking dish, layer 1/3 of your macaroni noodles, followed by 1/3 of your cheese; repeat. Finish with the last 1/3 of the noodles. Mix together your milk, salt, pepper, and eggs.

Pour over the macaroni and cheese mixture in the dish. It will look soupy at this point, and that’s okay.

Bake for a while, until hot and bubbly and the macaroni noodles on the top layer start to get a little crunchy looking.

Top with the remaining 1/3 cheese, and bake for a few minutes longer until the cheese is all melty and gooey. Yum!

Most people eat this as a side dish…myself, I could just sit down with a big huge bowl of this and eat ONLY this. Not much is better!

Southern Homemade Macaroni & Cheese

4 cups grated Cheddar cheese (sharp, medium, mild…you choose!)

10 ounces dry macaroni noodles

1/2 teaspoon salt

1/4 teaspoon black pepper

1 1/2 cups milk

2 large eggs

Cook macaroni noodles in boiling water until al dente. In a baking dish sprayed with nonstick spray, layer 1/3 of your drained macaroni noodles. Top with 1/3 of your cheese; repeat. Layer the remaining 1/3 cup noodles. In a separate small bowl, mix together the milk, eggs, salt, and pepper. Pour over the noodles and macaroni in the baking dish. Bake at 350 degrees until the mixture is bubbly and the noodles on top start to look crunchy. Remove from the oven and top with the remaining 1/3 cheese. Bake until the cheese is melted and the dish is bubbly, about 5 minutes. Serve hot.