Roasted Potato Wedges

Posted by Mandy on March 30th, 2011

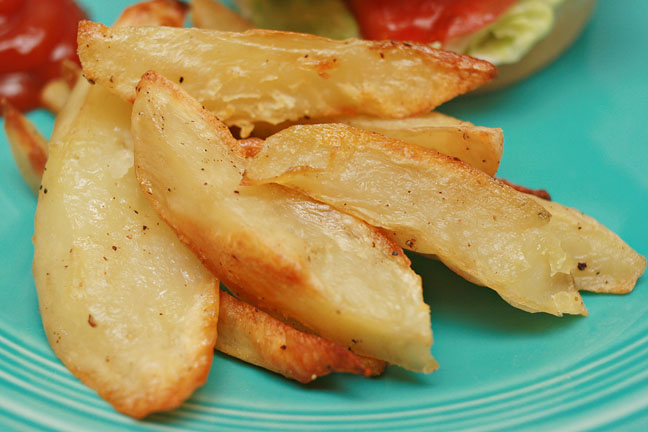
Remember the Grilled Chicken Sandwiches I posted sometime last week (http://www.thesupermomchef.com/?p=652)? Have you made those yet? I know some folks have because I have gotten huge rave reviews over them, and that makes me happy! I love recipes, but what I love even more than recipes themselves is sharing them with others so that they can enjoy the delicious goodies themselves. Well, if you haven’t made them, now you have an even better reason to make them because these little crunchy  potatoes make the perfect side dish and can roast away while you are outside grilling the chicken. This is probably one of the simplest side dishes I can imagine, and also one of the cheapest. Double score! (Betcha haven’t heard that since about 1995, huh?) Even my hubby, who is a self-proclaimed “baked” french fry hater liked these. Oh, and if you are looking for an easy way to wedge vegetables, Pampered Chef just came out with a new veggie wedger that makes the task super simple! Using that, I had these little wedgy babies in the oven in less than 10 minutes!

Roasted Potato Wedges

Baking potatoes, amount will depend on how many people you have to serve

olive oil

salt & pepper, to taste

Preheat oven to 400 degrees F. Peel potatoes, rinse, and cut into equal size wedges. Toss the potatoes into a large mixing bowl and add about a tablespoon of olive oil. Sprinkle with salt and pepper, but remember not to add too much at this point. You can always salt them more after they are done cooking. Spread onto a shallow foil lined baking dish that has been sprayed with non-stick cooking spray. Bake for 20 minutes, turn, and bake about 20 minutes more. Depending on the size of your wedges, you may need a little more cooking time. Cook until crisp and golden brown. Serve hot.

Strawberry Pretzel Salad

Posted by Mandy on March 28th, 2011

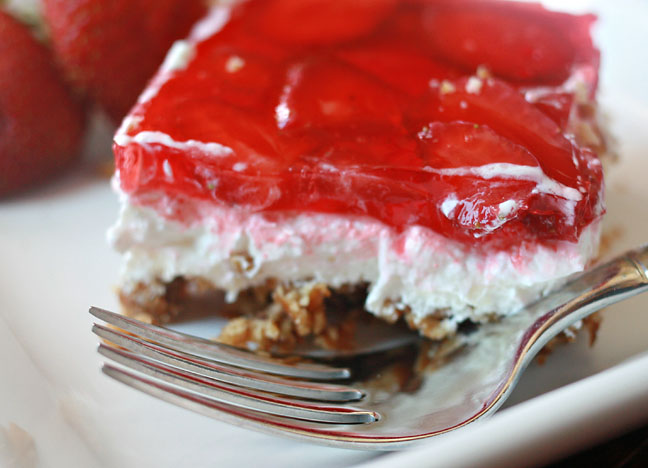
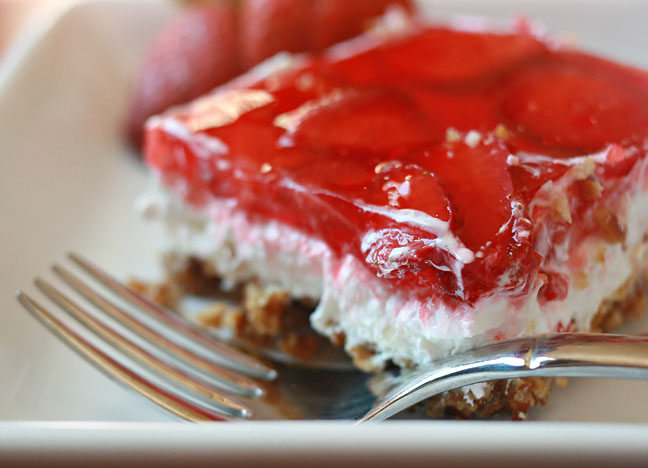
Yep, you guessed it! This is another recipe straight from my famous Mae Mae! I’m sure that you are now catching on to how great of a cook she really was. I remember, with this salad in particular, she’d go through phases. She’d make it over and over for a couple of weeks and then go for months again without making it at all. We were all happy to see this yummy salad, which is actually more of a dessert, show up on the bar (she didn’t have a kitchen table) for lunch. I was sure everyone in the good ole South had had this dessert at some point, but last week when I made it I sent some with my hubby to his parents and they had never had it before. My father-in-law said if he had never been told, he’d never have known that the crunchy layer is made of pretzels instead of pecans like most people normally assume. Louisiana strawberries are at their yummiest right now, so I’ve made this yummy conconction twice in one week! I know without a doubt that you’ll enjoy it just as much as we do!

Oh, and on a side note, I’ve decided to make some changes to the blog. Sometimes I think that my step-by-step photos are more annoying than they are helpful so I’ve decided to start posting just a final photo of the prepared recipe. If a recipe is particularly difficult, or would benefit by having step-by-step photos, I’ll still be posting them but if the recipe is pretty straightforward, I’ll just post the final photo. :)

Without further waiting, here ya go!

Cool, creamy, crunchy, sweet, tart goodness all in one bite…oh yeah!!!

Strawberry Pretzel Salad

2 cups crushed pretzels

3/4 cup melted butter

3 tablespoons sugar + 1 cup sugar, divided

1 (8 oz) package cream cheese, softened

2 cups Cool Whip (I just use the small package and don’t measure)

1 (6 oz) box strawberry Jell-O

1 quart fresh strawberries, washed & sliced

Preheat oven to 400 degrees F. Combine pretzels, butter, and 3 tablespoons sugar. Place in a 13×9″ baking dish; bake 10 minutes and set aside. Cream 1 cup sugar and cream cheese; fold in Cool Whip. Spread over completely cooled crust. Dissolve Jell-O in 2 cups boiling water. Chill until partially set. Add sliced berries and mixture over cream cheese layer. Chill until firm.

Matt’s Famous Grilled Chicken Breasts

Posted by Mandy on March 23rd, 2011

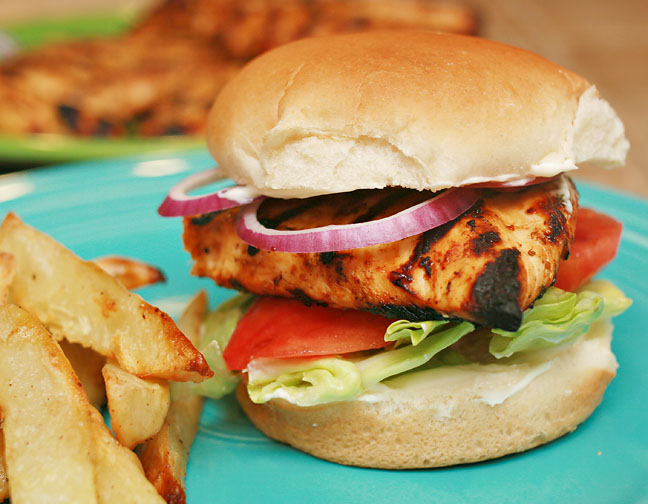
This is my time to brag! I have a hubby that makes the most delicious grilled chicken breasts ever! His are so juicy and so full of flavor that it makes your mouth water just by talking about it or thinking about it. They are truly that good, I kid you not.  So to honor him and his wonderful grill master skills, I thought it only appropriate to blog his recipe for grilled chicken breasts. Keep up the grill-king skills baby and I’ll keep cranking out the yummy goodies inside! Oh, and I wanted to take a picture of the grill-master at work, but had to make a last minute run to the store to pick up some hamburger buns. :)

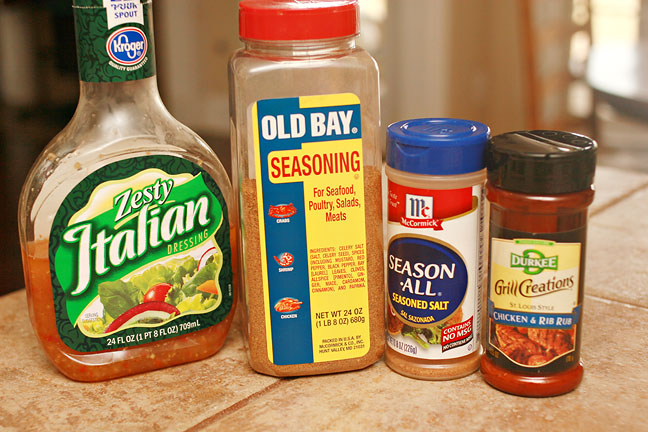
You’ll need some boneless skinless chicken breasts, so head on out to pick those up. While you’re out, you may wanna pick up these items as well.
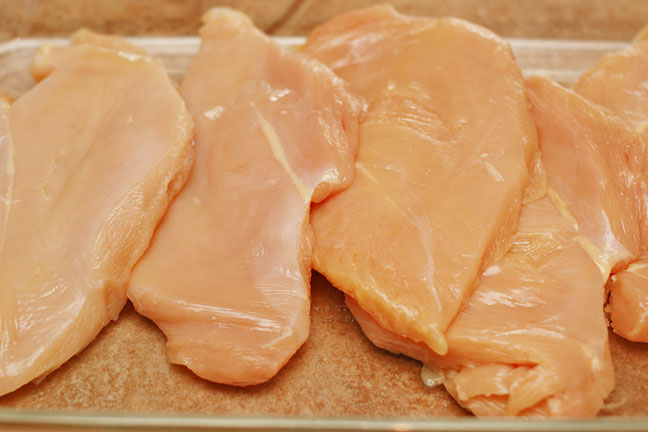
Clean up the breasts by removing all that excess fat and skin. Then pound the breasts out like so:
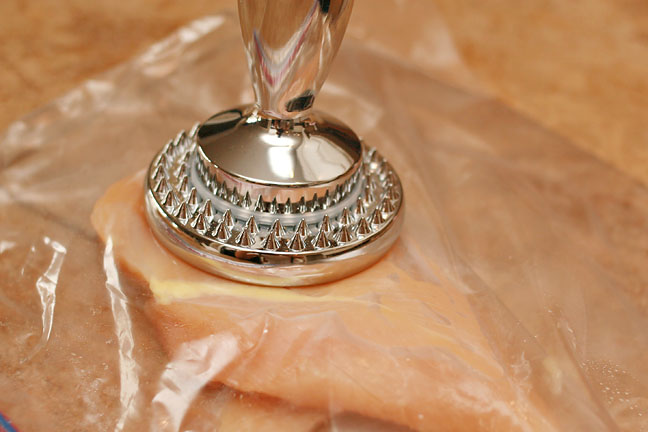
Continue pounding the breasts (insert corny breast joke here because I know you want to!) until they’re all about the same thickness. DO NOT skip this step! This is one reason why the chicken breasts stay so juicy. With them all being the same thickness, they all cook evenly so that you don’t have part of the breast all dry and overcooked from waiting on the thicker part to cook through. Trust me on this!
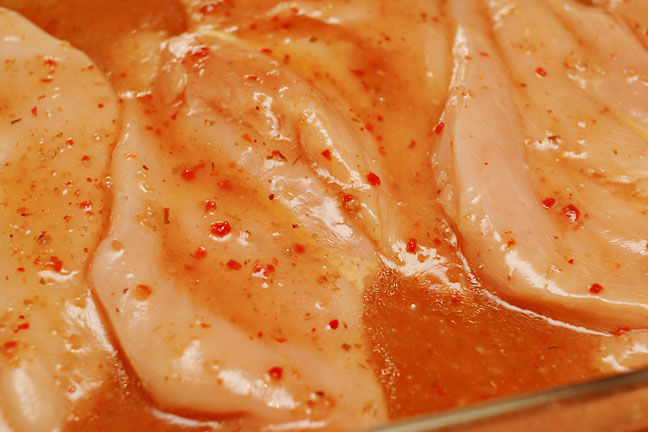
Pour some of the Italian dressing over the chicken, moving the chicken around to make sure it’s all covered. And because I know someone’s going to ask…it doesn’t matter how much you add. Just add enough to season the chicken somewhat. You don’t have to drown it, but you wanna add enough so that the chicken retains the moisture and flavor of the dressing.
Now it’s time to sprinkle the good stuff on! I start with my chicken rub because it’s my favorite. I like to add the most of it, but it tends to be a little salty so if you add a good bit of rub go easy on the seasoned salt. Add the Old Bay, remembering that it can get kind of spicy so if that’s your thing, add more! I don’t much care for spicy foods so I go easy on the Old Bay myself. Flip the breasts over, and sprinkle the other side accordingly.
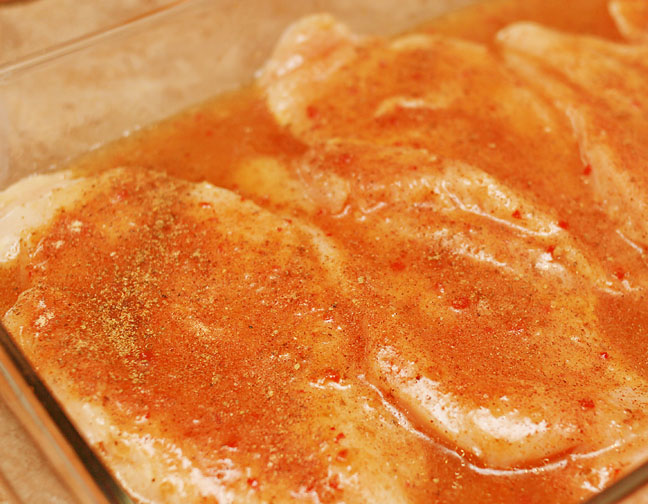
Now while this is marinating, go ahead and fire up the grill. It’ll need to sit for a while so the grill can be heating up while the chicken marinates. When we grill our chicken, we like to cook on only one side of the grill. For the side that you are cooking the chicken on, turn the burners down very low so that the fire won’t creep up and burn the chicken. For the side that you are not using, you can turn it up to about medium heat. That way the chicken is cooking on the inside due to the higher heat, but not drying out on the outside. Cook the first side until you have the grill marks just like you like them, then flip it over. You want to keep the flipping to a minimum so make sure the first side is done before flipping. After you flip it over, you can also baste the already grilled side with a little more of the marinade. Grill until the chicken is done…you can use a thermometer to test doneness if you’d prefer but I just use the good old fashioned rule of cooking chicken until the juices run clear.
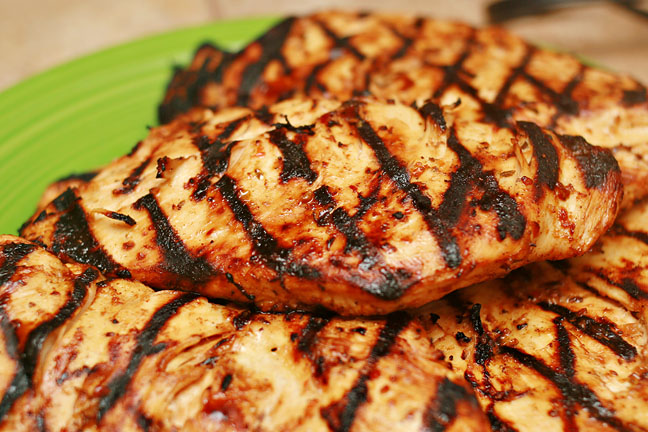
Serve just as-is (how my kids prefer it), or slap it on a hamburger bun with some yummy veggies (like I like it)! Either way you’ll be glad it’s finally time to chow down on this delicious meal!
Matt’s Famous Grilled Chicken Breasts

boneless, skinless chicken breasts

Italian dressing

Old Bay seasoning

Chicken Rub (we prefer Durkee)

seasoned salt

Cut away any remaining chicken skin or fat from the breasts; pound with a meat tenderizer or mallet until the breasts are all equal thickness. Add all of the chicken into a large baking dish. Pour some of the Italian dressing over the top, making sure that all of the chicken is touching the dressing. Sprinkle the seasonings on top according to your taste. We prefer to use the most chicken rub, and only a small amount of seasoned salt (the chicken rub already contains salt) and Old Bay (the more Old Bay you add, the spicier it’ll be). Set the chicken aside to marinate. Meanwhile, fire up the grill. When we grill our chicken, we like to cook on only one side of the grill. For the side that you are cooking the chicken on, turn the burners down very low so that the fire won’t creep up and burn the chicken. For the side that you are not using, you can turn it up to about medium heat. That way the chicken is cooking on the inside due to the higher heat, but not drying out on the outside. Cook the first side until you have the grill marks just like you like them, then flip it over. You want to keep the flipping to a minimum so make sure the first side is done before flipping. After you flip it over, you can also baste the already grilled side with a little more of the marinade. Grill until the chicken is done…you can use a thermometer to test doneness if you’d prefer but I just use the good old fashioned rule of cooking chicken until the juices run clear. Enjoy!
Pimento & Cheese

Posted by Mandy on March 23rd, 2011

Not many things are as Southern as Pimento & Cheese. I know around here every family has their own variation of the classic spread. Our family’s version is from none other than my Mae Mae! I know you’ve all heard alot about her, but you just might as well get used to it because a good many of my “family” recipes come straight from her. When I was in high school and college, taking care of Mae Mae was a big part of my week and I can honestly say that I enjoyed every single second. She had a best friend named Lois, who was somewhat reliant on me as well. We’d pack up in my mom’s car and head to town at least a couple times a week. I’d take them to the grocery store and go through both of their lists, running all over the store grabbing things off the list while they strolled the aisles slowly seeing if there was anything else that looked appealing to them that day. One of the most prominent memories that I hold of Mae Mae is cooking with her, and because of my love of cooking and fear of losing those recipes forever, I sat down with her and handwrote all of her recipes down while she told me what to write. I thoroughly remember this entire process. It took months but I am grateful every single day when I pull out my cookbook full of her recipes that I can still make things that take me back to the time I spent with her. I miss you dearly Mae Mae but I know you’d be so proud and happy that I’m sharing your recipes with everyone else!

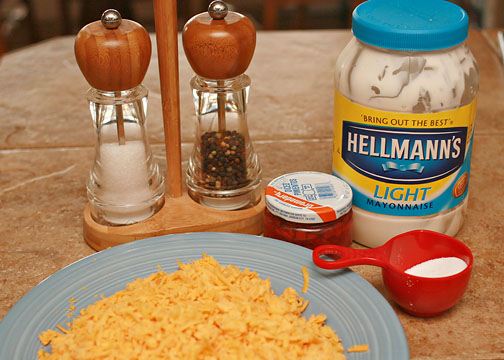
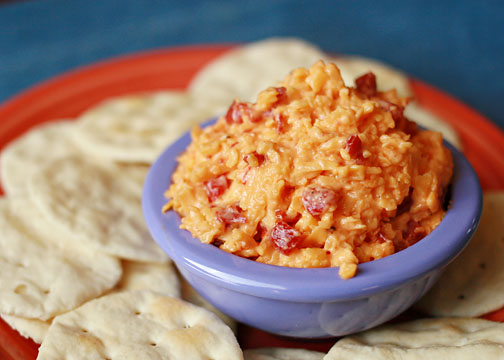
You’ll need some pimentos, cheese, mayonnaise, salt & pepper, and sugar

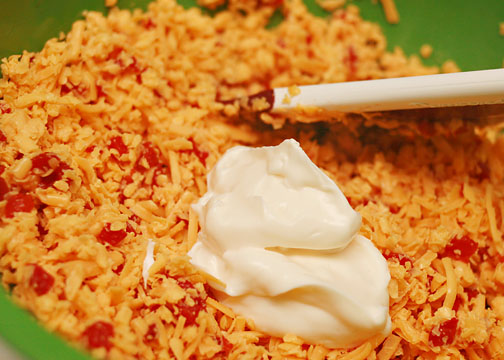
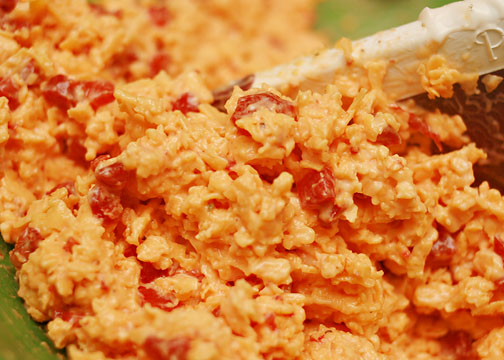
Mix together the cheese and drained pimentos. Add in a dollup or two of mayonnaise. And this is the part where you’re pretty much on you’re on…every good Southern cook just adds ingredients until things are “right”, the way they like them. If you like yours creamier, then by all means add lots of mayonnaise. I do advise you to start with an amount smaller than you think you’ll need because you can always add more, but you can’t take it away once you’ve added it.

Add just a tiny pinch of sugar. Add salt and pepper to taste. Stir it all up good because that’s what Mae Mae says to do!

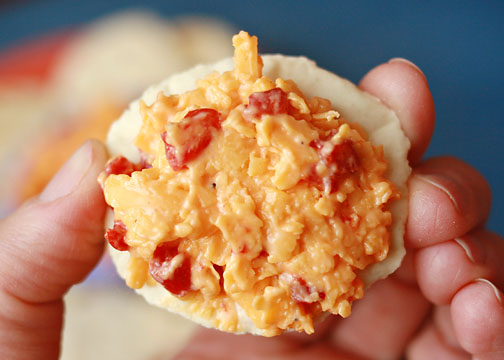
My favorite way to eat Pimento and Cheese is the true Southern way, on a big slice of regular old white bread. You gotta trim the crusts to make it 100% Southern too! Although, I didn’t have any white bread in the house today when I made this so I had to settle for a cracker. Yummy!

Oh my heavens it’s ever so delicious!!!

Pimento & Cheese

shredded Cheddar cheese

1 small jar pimentos, drained

mayonnaise

salt & pepper, to taste

pinch of sugar

In a large mixing bowl, stir together shredded cheese and pimientos. Add a dollup of mayonnaise and stir to combine; continue adding mayonnaise until it’s the consistency you desire. Stir into a pinch of sugar; add salt and pepper to taste. Stir to combine. Store refrigerated until ready to serve.

Mexican Pinwheels

Posted by Mandy on March 21st, 2011

I originally saw these little babies posted on a friend’s Facebook page, and I just knew right away that I had to try them! Thank goodness she was kind enough to share the recipe with me, and allow me to share it with all of you. This recipe comes from a sweet girl named Brandi that I have known for a very long time. Actually, I know her best because she was great friends with my cousin when I was little. They were in high school and I remember seeing them do all the things that high school girls do…ride around listening to music, talking to boys, etc. So of course I thought that they were the coolest things around and wanted to be just like them. Well, now that we are grown and we both have families of our own that we are expected to feed, we can finally be alike…by making the same recipe! Thank you for sharing your yummy recipe Brandi! I look forward to receiving more recipes from you to share here with all my blog friends!

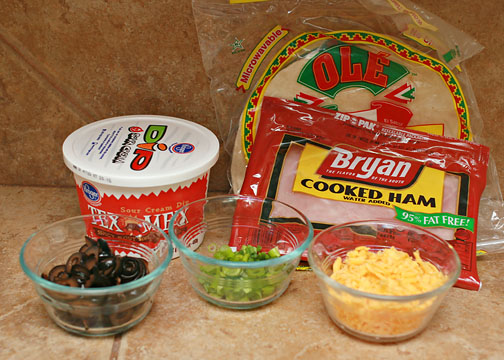
Some yummy ingredients!

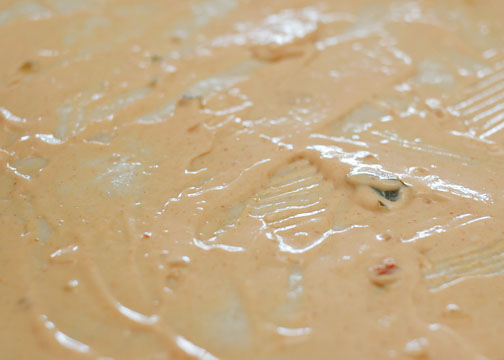
Start by warming up your tortillas just slightly…you don’t want them hot, just somewhat pliable. I popped mine in the micrwave for about 10 seconds two at a time. Spread some of the yummy sour cream goodness over them. Don’t have any available where you live? That’s okay too! Just mix together a little sour cream with taco seasoning. It’ll be just as delicious!

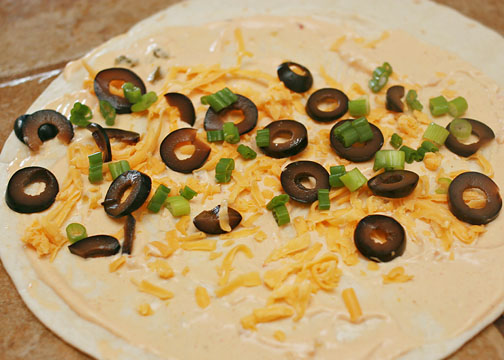
Sprinkle a little Cheddar cheese over the top (the original recipe doesn’t call for cheese…I just had some and it sounded yummy so I thought I’d throw some in there), then the same again with the green onions and chopped olives.

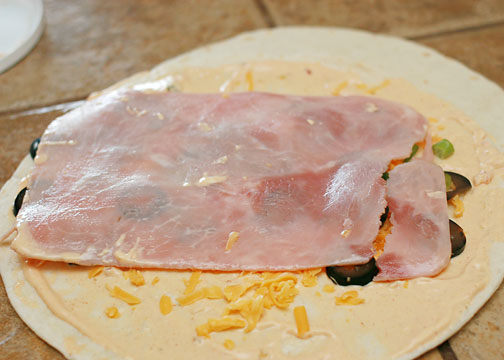
Spread a piece of ham across the top of the sprinkled yummies. It most likely won’t be wide enough to fit the whole tortilla. We’ll just chop those ends off when we slice them up.

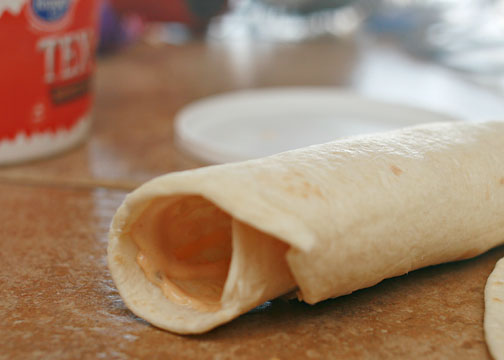
Roll that baby up!

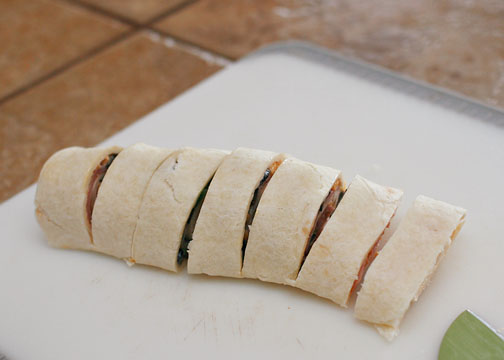
Pop them in the fridge for a little while to let them set up some. I probably let mine rest about an hour or so. Then pull it out and slice it on up!

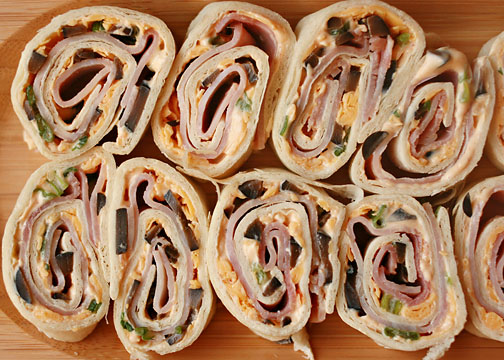
You know your friends will love these little yummy pinwheel thingies!

Mexican Pinwheels

Southwestern flavored sour cream dip

tortillas

sliced ham

shredded Cheddar cheese

chopped olives

sliced green onions

Warm tortillas until pliable. Spread sour cream mixture on each tortilla. Sprinkle the Cheddar cheese, green onions, and olives over the sour cream. Top with a slice of ham. Roll up and allow to refrigerate for about an hour, or until firm. Slice into pinwheels. Serve with pinwheels faced upwards on a platter.

Note: This recipe is no exact science, just use however much of each ingredient you’d prefer to use. If southwestern sour cream is not available, regular sour cream mixed with taco seasoning, to taste, can be substituted.

Chicken Pot Pie

Posted by Mandy on March 16th, 2011

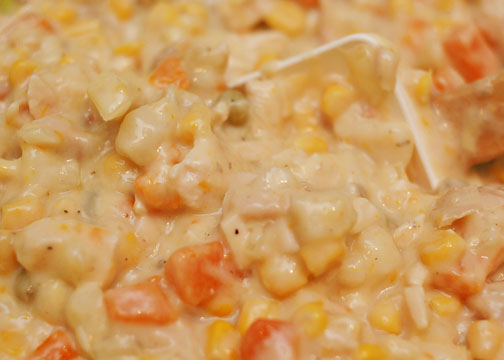
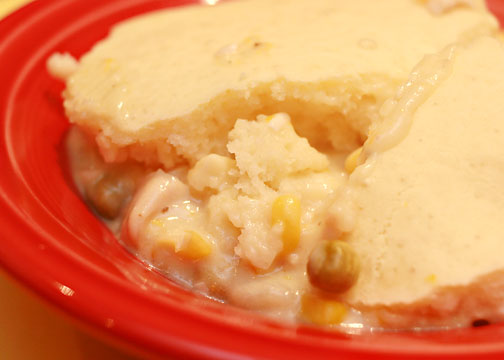
The first time that I had this dish was when I was in the 8th grade. We had just moved into our new house in the country and my mom had just had surgery, so I was taking care of the tasks that she couldn’t do. Our new neighbors had sons in my grade in school, so they brought us dinner and this yummy dish was it. We all five sat down to eat that night and devoured it! The most wonderful thing about it was that she attached the recipe to the dish so that we could make it again whenever we liked, which we have done many times over the years. It’s not your traditional chicken pot pie with a crispy crust, but this one is by far one of the best that I’ve ever had! Oh, and sorry ’bout the terrible pictures today. I made this last week and was apparently not paying one bit of attention to what I was doing because my camera settings were all over the place and well…none of the settings were right. Next time I make it I promise I’ll update this post with a better picture.

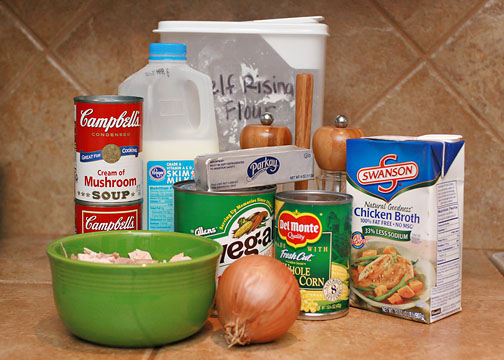
You need these things to make it

Chop the onion, combine that with the chopped chicken, chicken broth, canned soups, drained Veg-All, drained corn, salt and pepper. Pour into a 9×13″ baking dish that has been sprayed with non-stick cooking spray.

Mix together the milk, butter, and flour. Stir until well combined. Pour over the vegetable mixture and spread it out, covering the entire dish. Bake at 350 degrees until the crust is golden brown. Serve hot.

Chicken Pot Pie

2 cups chopped, cooked chicken

2 (15 oz) cans Veg-All, drained

1 (15 oz) can whole kernel corn, drained

salt & pepper, to taste

1/2 cup chopped onion

1 (16 oz) can chicken broth

1 can cream of mushroom soup

1 can cream of chicken soup

1 stick butter, melted

1 1/2 cups self-rising flour

1 cup milk

In a large mixing bowl, stir together the corn, onions, salt, pepper, soups, Veg-All, chicken, and chicken broth. Pour into a prepared 9×13″ baking dish. In a separate bowl, stir together the flour, butter, and milk. Pour over the vegetable mixture, spreading it to cover the entire dish. Bake at 350 degrees until the crust is golden brown.

Corn & Green Olive Dip

Posted by Mandy on March 11th, 2011

Let me just admit this and get it over with. I’m a green olive addict. If there were a Olive Overeaters Anonymous program somewhere, I’d need to be the first person in line to sign up. I love it so much that I can eat them just straight out of the jar…and I love them so much that I have turned my daughter into an olive overeater too. She’s even worse than me, though. She’ll even drink olive juice right out of the jar! Now I won’t lie and say I’ve never done it before, but I don’t do it regularly like she does.

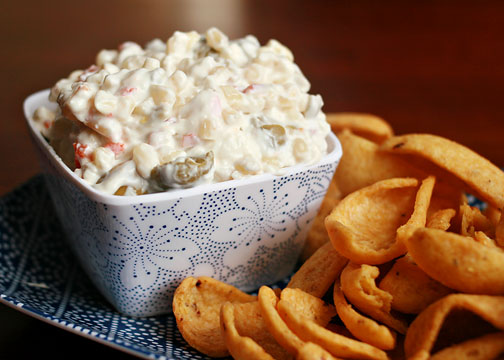
And on a completely different note, I’m also a corn dip addict. No matter where I am, if I see a corn dip I absolutely have to taste it! I’ve tried about a gazillion different corn dip recipes and love every last one of them. This is one I came up with the other night on the spur of the moment. I was throwing together some sandwiches for dinner and really wanted a dip to go along with it. I was craving olives and corn dip so naturally just thought to throw them all together and make a dip. Boy am I glad that I did because this dip is delicious! Not knowing whether or not it was going to be any good, I didn’t take progressive photos along the way. But I also don’t want ya’ll to have to wait for me to make it again before posting the recipe, so you’ll just have to go by the recipe strictly on this one. I think you’ll be okay, though. Just dump a few cans together, stir in some creamy goodness, and enjoy!
Corn & Green Olive Dip

2 tablespoons mayonnaise

1 (8 oz) package cream cheese

1 (11 oz) can shoepeg corn, drained

1/2 – 3/4 cup green salad olives (more or less, depending on your taste)

2 tablespoons olive juice

Mix all ingredients together until well combined. Store chilled and serve with corn chips or tortilla chips.

Note: Light mayonnaise and neufchatel cheese can be substituted for the cream cheese and mayonnaise, if desired.

Mandarin Pasta Salad

Posted by Mandy on March 9th, 2011

Okay, before you want to roll your eyes and think, “Like I would eat that!” just give me a chance to explain. The reason why I know you’re thinking that is because that’s the same exact thing I thought when I first saw this recipe. My cousin, Kathy, sent it to me and it sounded absolutely disgusting to me…I won’t lie to you. Then I remembered that every single recipe Kathy has ever shared with me was absolutely delicious, even though most didn’t sound too appealing before trying the recipe out. So I thought I’d give it a shot, and boy am I glad that I did! Kathy held true to her reputation of sharing great recipes because this salad was to die for! If you like Asain flavors, you’ll particularly like this salad. I made it for my son’s birthday party last year to serve with burgers and hot dogs and everyone went NUTS! Even my aunt who is an extremely picky eater fell in love with the first taste of this delicious salad. So there…go try it and then come back to me and tell me how much you love it just like I had to tell Kathy. :)

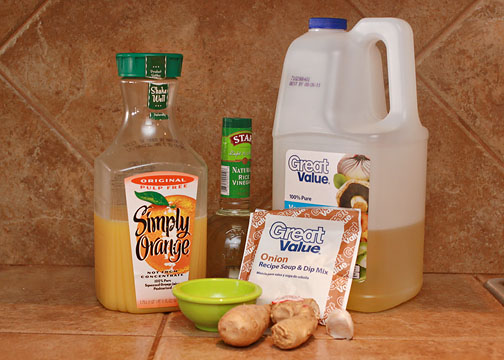
We’ll start by making the dressing for the salad. You’ll need these items:

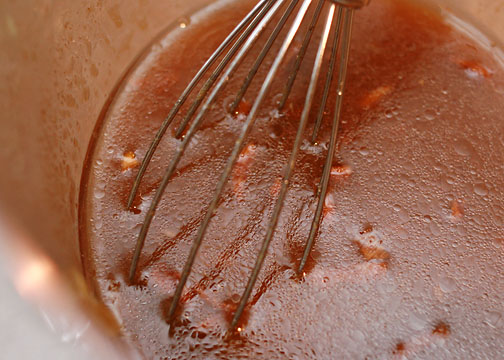
Mix all ingredients together using a whisk; set aside. It should look something like this.

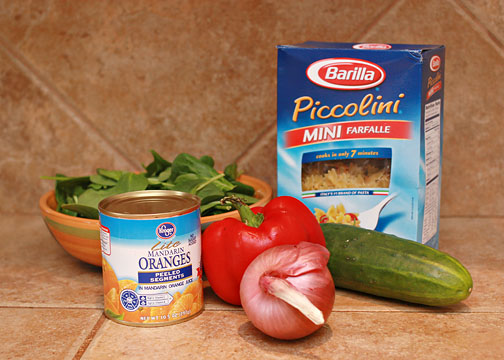
Meanwhile, boil the pasta. Rinse with cold water to stop the pasta from cooking further. Grab the items you’ll need for the salad, which is pictured below:

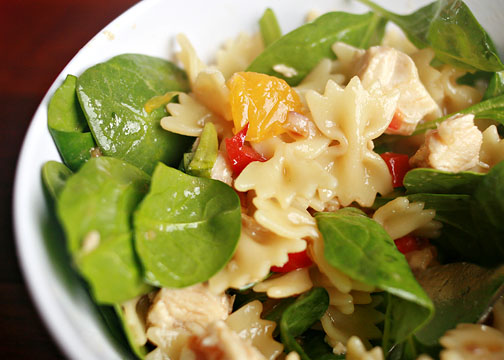
Remove the seed from the cucumbers, chop the onion and bell pepper, drain the oranges. You know, you gotta make it look pretty. Mix the vegetables and chicken (not pictured above) with the cooled pasta, and pour the dressing over all. Top with toasted slivered almonds (forgot to take a photo of this because I was so excited to eat I forgot to add them to my salad). Serve with baby spinach, take a bite, and then you’ve officially arrived in salad heaven!

Mandarin Pasta Salad

1 (8 oz) package cooked & cooled farfalle pasta

1/2 cucumber, scored, seeded & sliced

1/2 cup diced red bell pepper

1/2 cup chopped red onion

1 (6 oz) package fresh baby spinach leaves

2 cups diced, cooked chicken

1 (11 oz) can mandarin oranges, drained

1/2 cup slivered almonds, toasted

1 recipe Mandarin Asian dressing

Mix vegetables, pasta, almonds and chicken together. Pour the dressing over the salad and toss. Serve immediately.

Note: You can prepare the pasta salad and store, refrigerated, and toss with spinach when ready to serve.

Mandarin Asian Dressing

1 teaspoon finely chopped, peeled gingerroot

1 garlic clove, pressed

1/3 cup rice vinegar

1/4 cup orange juice

1/4 cup vegetable oil

1 teaspoon sesame oil

1 envelope onion soup mix

2 teaspoons sugar

Whisk all ingredients together until combined well.

Broccoli Crunch Salad

Posted by Mandy on March 4th, 2011

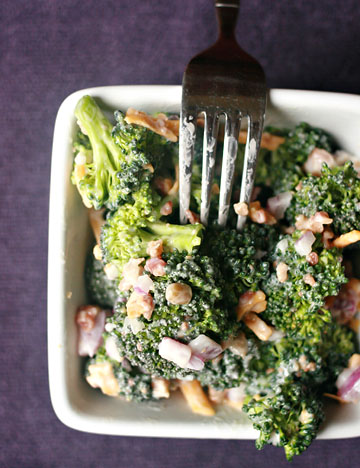
This recipe falls in the “oldie but goodie” category for sure! I have always loved broccoli for as long as I can remember, but when Matt and I got married he despised it. He wouldn’t go anywhere near it I tell ya! I can happily say I’ve converted him and he now likes broccoli…maybe not as much as me, but at least he’ll eat it. He still won’t eat this salad, though, because of the onions but that’s okay because it just means more for me!

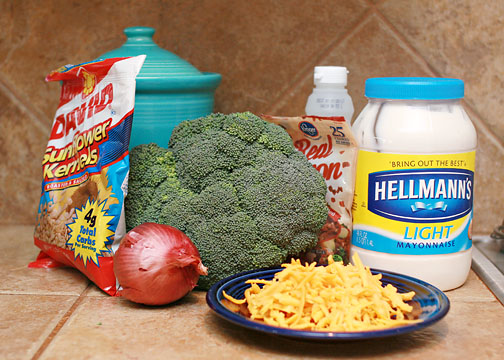
It looks like a lot of ingredients, but really it’s not!

In a small mixing bowl, whisk together the mayonnaise, vinegar, and sugar until well combined. Cut the broccoli into bite-size pieces and place into a large mixing bowl.

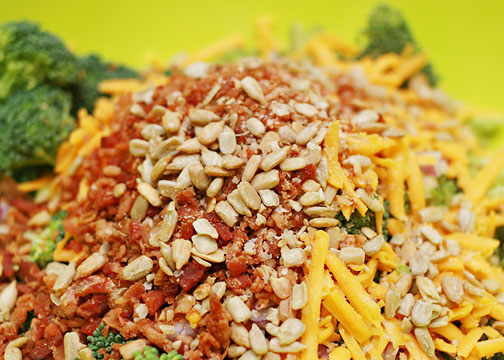
 Add the remaining ingredients (minus the mayonnaise mixture).

Stir until all the ingredients are well combined. Top with the mayonnaise mixture and stir again until well combined. Store in the refrigerator until ready to serve. Side note for photography critics – excuse the blown out parts…I got a little too happy with the ISO. :)

Broccoli Crunch Salad

1 head broccoli

6 slices bacon, fried crisp & crumbled

1/2 cup chopped red onion

1 cup shredded sharp Cheddar cheese

3 tablespoons sunflower kernels

3/4 cup mayonnaise

1 1/2 tablespoons white vinegar

1/8 – 1/4 cup granulated sugar

In a medium mixing bowl, combine mayonnaise, sugar, and vinegar. Wash broccoli and cut into bite-size pieces; add to a separate large mixing bowl. Add remaining ingredients, minus the mayonnaise mixture; stir to combine. Add the mayonnaise mixture; stir to combine well. Store chilled until ready to serve.

Note: One handful of real bacon pieces (found on the salad dressing aisle) can be substituted for the cooked and crumbled bacon, if desired.

Nana’s Crock Pot Candy

Posted by Mandy on March 2nd, 2011

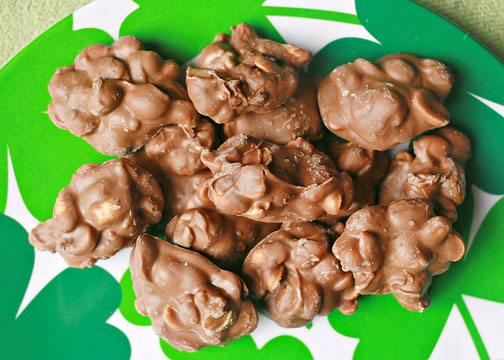
My Nana is such a little sweetheart. She made these yummy treats for my kids and gave them to us one day when we stopped by for a visit. That week I had decided I was going to start eating better, and trying not to snack between meals as much. When I arrived at her house, I had just had lunch with my mom and I was definitely past the full point. When we walked in and she gave the kids these I simply said, “No, thank you,” and walked away. Yeah ummmmm….that didn’t last! My baby (okay, she’s not a baby anymore, but she’s MY baby) was eating one and made me taste a bite of hers and after that I just couldn’t stop! I was defenseless in saying no to these yummy little treats! I have had crock-pot candy before, but nothing that ever tasted like this. Most of the recipes I’ve tasted in the past taste like burned peanuts, which is NOTHING like these taste. She gave me the recipe and I told her that I just HAD to give ya’ll the recipe for these little yummy chunks of goodness because I  knew ya’ll would all love them as much as me my kiddos did. So here’s the recipe so that you can make some of your own! Oh, and I don’t have any progression photos of this recipe because I’ve never made these myself. They are so good that I couldn’t wait that long to show them to you. I just took photos of the ones she gave us so that I can blog them for ya’ll. Aren’t I sweet? :)

Nana’s Crock-Pot Candy

1 (16 oz) jar salted peanuts

1 (16 oz) jar unsalted peanuts

1 (12 oz) bag milk chocolate chips

1 bar German sweet chocolate, broken into pieces

2 (1.5 lb) packages white almond bark, cut into pieces

Layer all ingredients in a crock-pot or slow cooker in the order listed. Cook on low for three hours without opening the lid. Stir and drop by teaspoonfuls onto waxed paper. Makes 150-160 pieces.

Note: The almond bark will appear unmelted even after the three hours, but after stirring it will blend well.